Upload Timesheet - Text File
💬 Note
There are four methods to process timestamp data into a Timesheet:
- Upload Text Files: Uploading Timestamp data using Text Files. See how to Upload Timesheet - Text Files at this LINK.
- Auto Upload: Use this method if you do not want to keep Auto Sync enabled 24/7.
-
Auto Sync: When employees clock in using a fingerprint scanner connected to ByteHR, the system automatically retrieves and processes Sign In/Out Timestamps.
See how to use Auto Sync at this LINK.
- eCheckin: When employees clock in using eCheckin, the system processes the data into real-time Timestamp.
The Steps for Uploading Employee Clock In and Clock Out data using a Text File are as follows:
-
Go to the Timesheets tab.
Click "Upload Icon".

Select Text File.
Select the date format for (From Date) and (To Date).
There are six date and time formats as follows:
- dd/mm/yyyy hh:mm:ss
- mm/dd/yyyy hh:mm:ss
- yyyy/mm/dd hh:mm:ss
- dd-mm-yyyy hh:mm:ss
- mm-dd-yyyy hh:mm:ss
- yyyy-mm-dd hh:mm:ss
-
Click Upload.
Uploading text files will not affect employees who do not have a Shift Schedule or a fingerprint scan ID.

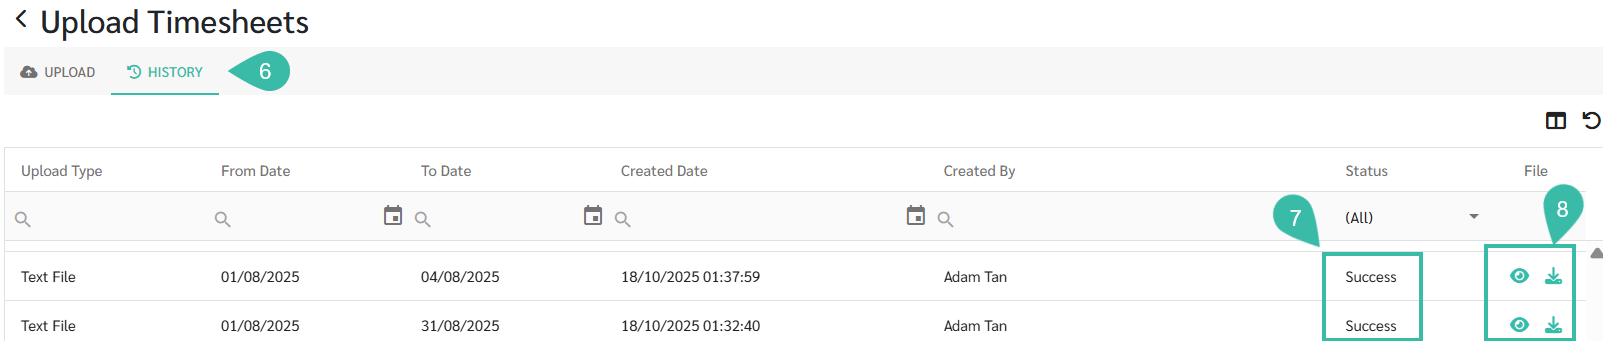
- Clicking upload will display the History page for your Timesheet uploads.
- Once the file has been successfully uploaded to the system, the status will be shown as Success.
-
On the History page, admin can view the Uploaded Text File and can download uploaded files for review by clicking the Download icon.
-
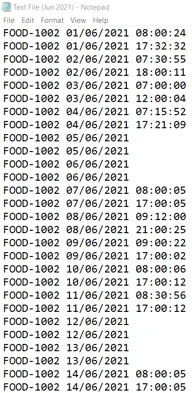
Example text file used for uploading.


🚩 Rule: Upload Timesheets - Text File Rule
- The text file must include only the fingerprint scan ID of the employees whose data you want to upload.
- The file must contain timestamps for the date(s) being uploaded.
- The date format must follow one of the formats supported by the system.
See the guide on Uploading Timesheet - Excel files at this LINK.