Upload Timesheets- Excel File
💬 Note
Uploading an Excel file to edit the Timesheet is used when you need to change Shift times, Holidays, and time entries in the Timesheet. This is useful if shift changes occur after the Timesheet has been loaded.
The Steps to Upload Excel File to Change Timesheet Data are as follows:
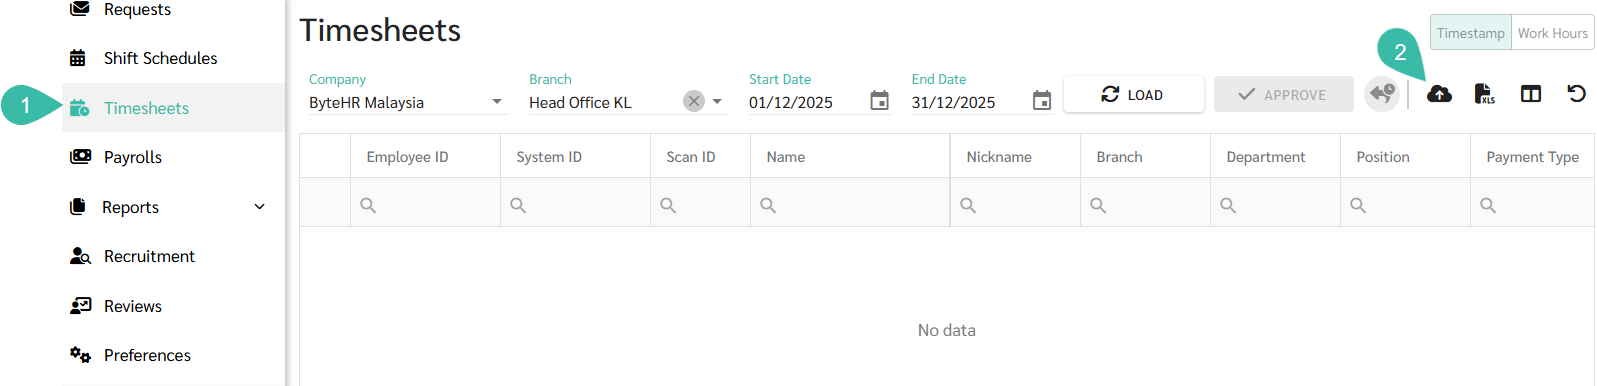
- Go to the Timesheets tab.
-
Click Upload.
- Select Excel File under Upload From.
-
Click Upload.

-
Select the Excel file you want to upload and click Open.

-
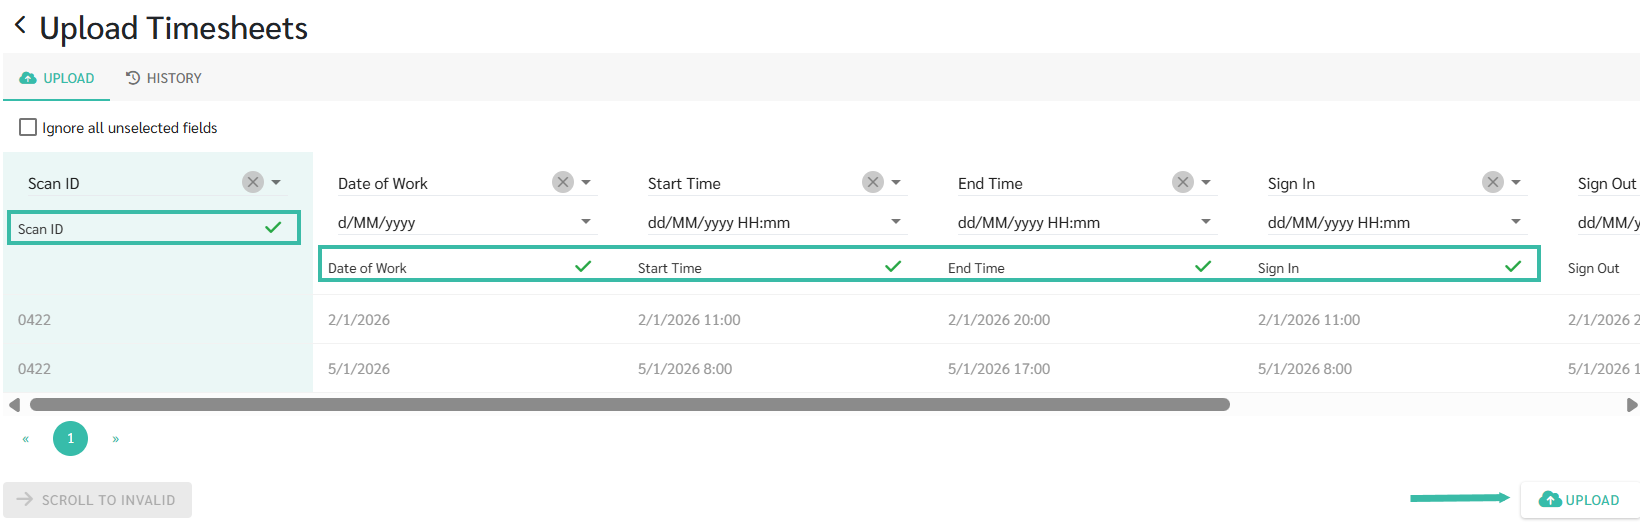
Enter the following information into the Excel file: Fingerprint scan code (Scan ID), Date of Work, Start Time, End Time, Sign In, Sign Out, and Day Off. Enter Y for days off; otherwise, enter N.|

- Verify that the data is matched with the fields in the system. A checkmark will be displayed when the match is successful.
-
Click Upload.
Note: Uploading an Excel file will not affect employees who do not have a Shift Schedule. If you upload a date where overtime conversion to leave has already been approved, the system will not modify the Timesheet.
If you upload Sign In and Sign Out fields on a date where Edit Sign In/Out has been approved, the system will not modify the Sign In and Sign Out fields in the Timesheet.
-
Clicking upload leads you to the History page for your uploads Timesheets.

- Once the file has been successfully uploaded to the system, the status will be shown as Success.
-
The admin can view the details of uploaded Timesheet by clicking on the Eye Icon and can download the uploaded files for review by clicking the Download icon.


🚩 Rule: Rules for uploading Timesheets - Excel files.
1. In the Excel file, the only required fields are Employee ID/System ID/Scan ID and Date of Work. If the remaining fields are not filled in, the system will display data from the Shift Schedule and actual time entries on the Timesheet page.
2. The Excel file should only contain employee IDs and data for the date you wish to upload.
See the guide on Upload Text Files from a fingerprint scanner at this LINK.