Setting Additional Timestamp Locations (Preference -> Locations)
Steps for Adding Timestamp Locations.
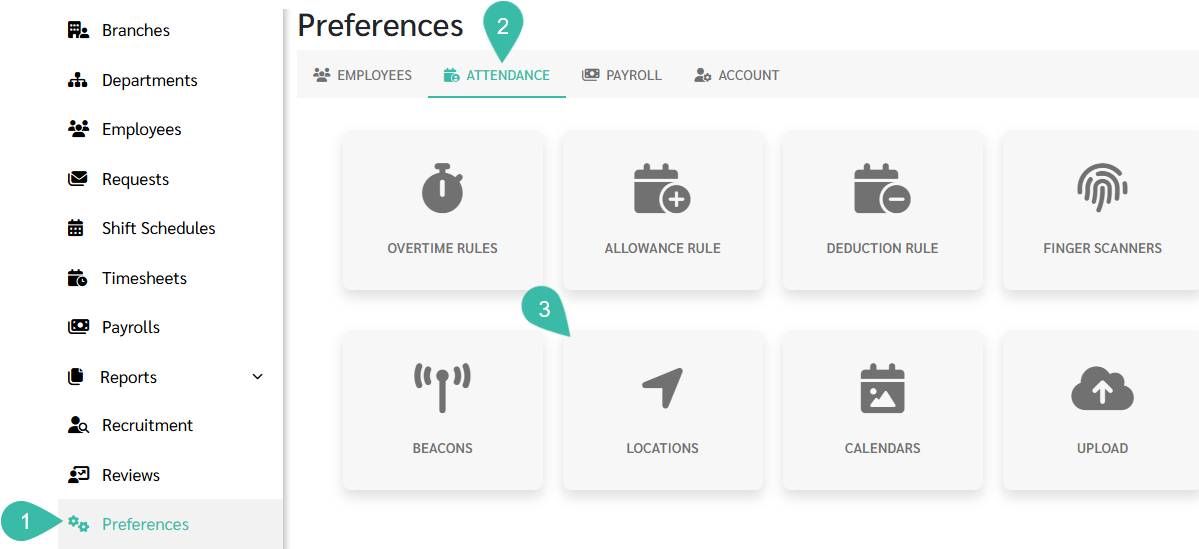
- Navigate to the Preferences tab.
- Select Attendance.
-
Click Locations.
-
Click the Add button.

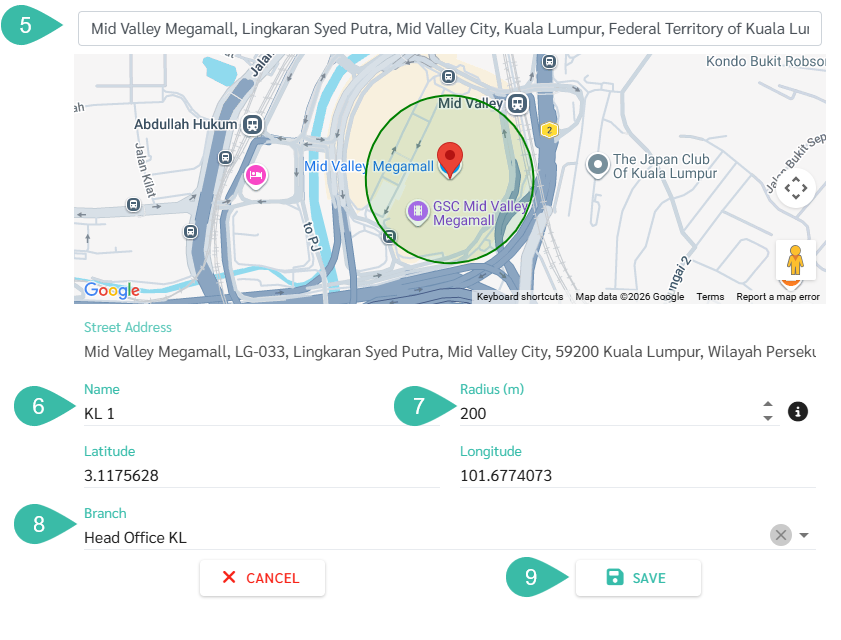
- Add a location by searching in the "Search Location" field. The system will find a location, place a pin, and automatically enter the latitude and longitude.
- Enter the desired name.
- Specify the radius/width; it should not be less than 100-150 meters.
- Select the branch where you wish to authorize timestamps for this location.
-
Click Save.