Announcement ***Add On***
To Create Announcements, follow the steps below:
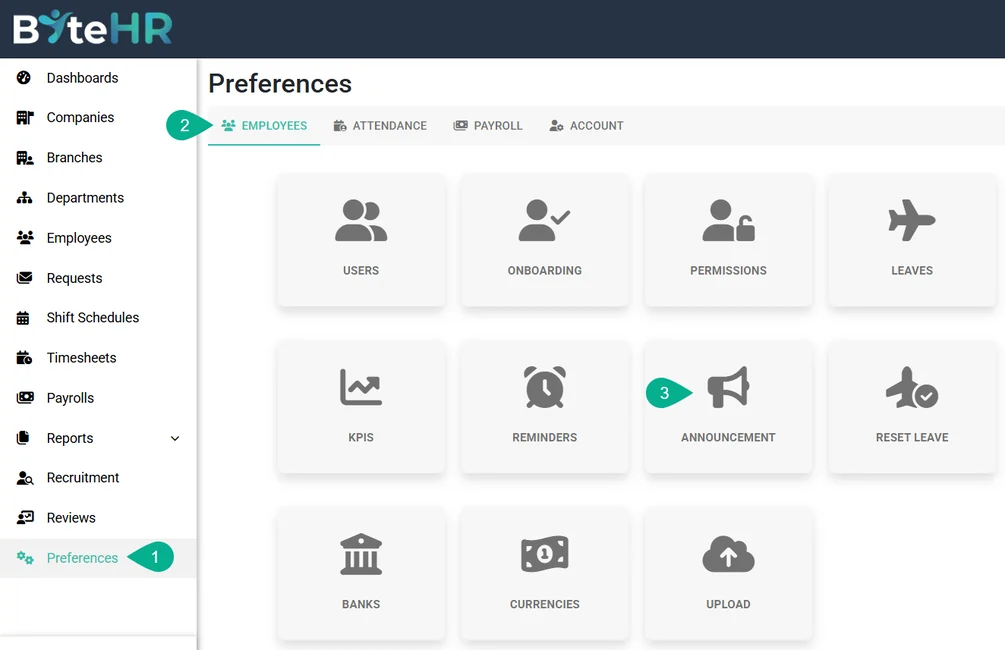
- Go to Preferences.
- Select Employees.
-
Click Announcements.
-
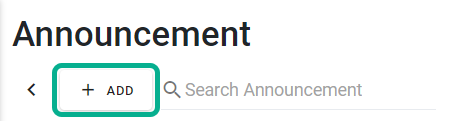
Click + Add.
- Fill in the details of the Announcement.
- Select a company. (***Required field***)
- Select Branch ***Required field***
-
Select a department.
If no department is selected, the system will send the Announcement to all departments in the selected branch.
-
Select a position.
If no position is selected, the system will send the announcement to all positions in the selected branch.
-
Enter the Announcement Name ***Required Field***
Duplicate announcement names are not allowed.
-
Enter the Announcement ID ***Required Field***.
The announcement ID can be a combination of numbers, letters, or symbols, such as HR/001-2022.
Duplicate announcement IDs are not allowed.
-
The Announcement Date
Must be the current date or a future date; you cannot select an announcement date that has already passed.
-
Select Announcement Time.
If you select the current date, the system will lock the announcement time to "Now".
If you select a future date, the system will allow the admin to choose the announcement time of their choice.
- Please include "Announcement By" (***Required field***).
-
You can upload a maximum of 1 attachment, with a maximum file size of 7 MB.
Supported file types include Word, Excel, PDF, Zip; image files (such as JPEG, JPG, PNG, GIF, TIFF, PSD, PDF, EPS, AI, INDD, RAW); and video files (such as MP4).
-
You can add tags to your announcement, such as Urgent or General.
Simply type the desired tag name and press Enter to create a new tag.
You can select a maximum of 3 tags per announcement.
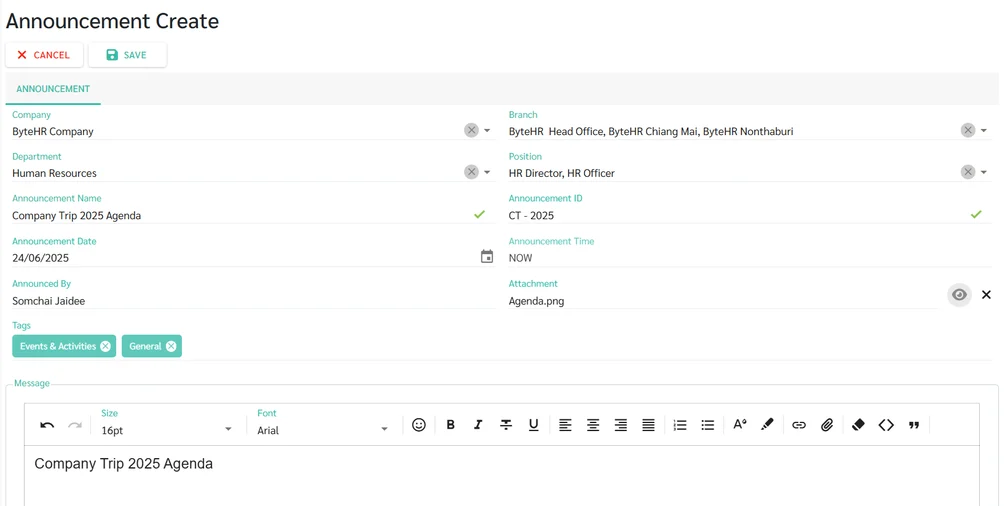
- Enter the message you want to announce. You can use the toolbar to customize the font.
-
Adjusting font size and font.

-
Emoji

-
Bold, italic, hyphen, underline

-
Page layout

-
Create a List

-
Text and background color

-
Add a hyperlink or attach a file.
*This allows you to attach files along with the announcement message. Each file must be no more than 7 MB and there is no limit on the number of files you can attach.

-
Create a block or quote text.

-
Clear Format

-
-
Once you have finished creating the announcement, click Save. (Example )

-
If no announcement date is specified, the system will save the announcement as a draft. The admin can edit and specify the announcement date later.

-
When the scheduled date and time arrive, the system will post the announcement. The announcement's status will change from Scheduled to Announced.

-
Employees will receive an email notification about the announcement and can click on "View Announcement" to see the details.

-
Once the announcement is made, the admin can click on the "Recipients" tab to check the list of employees and verify whether they have read the announcement.
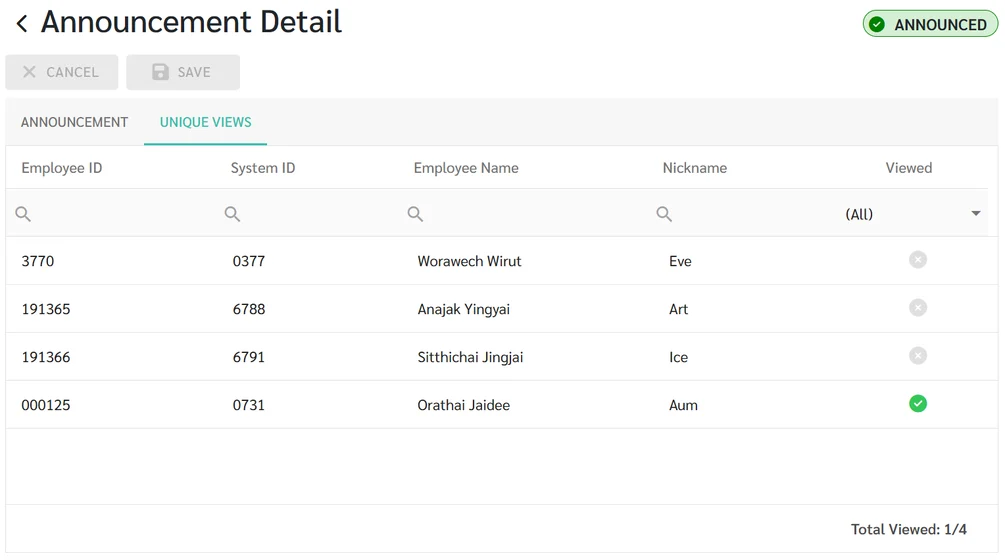
-
You can also check the number of recipients and readers of the announcement in the announcement table located in front of the announcement menu.

-
-
Admin can hide already posted announcements by checking the "Hide" option next to that announcement.


Note
-
You can delete announcements that are marked as Announced.

- It is not possible to edit the Announcement Date to a past date or the current date for announcements that are in the Scheduled status.
- New employees can view previously posted announcement under the branch, department, and position they are assigned to.