Add New Payments
Payments is designed to allow admins to create and manage various types of payments beyond salary, such as bonuses, commissions, or other payments according to company policy.
This feature supports multiple payment scenarios and provides greater flexibility in payment management.
How to Add a Payment Type
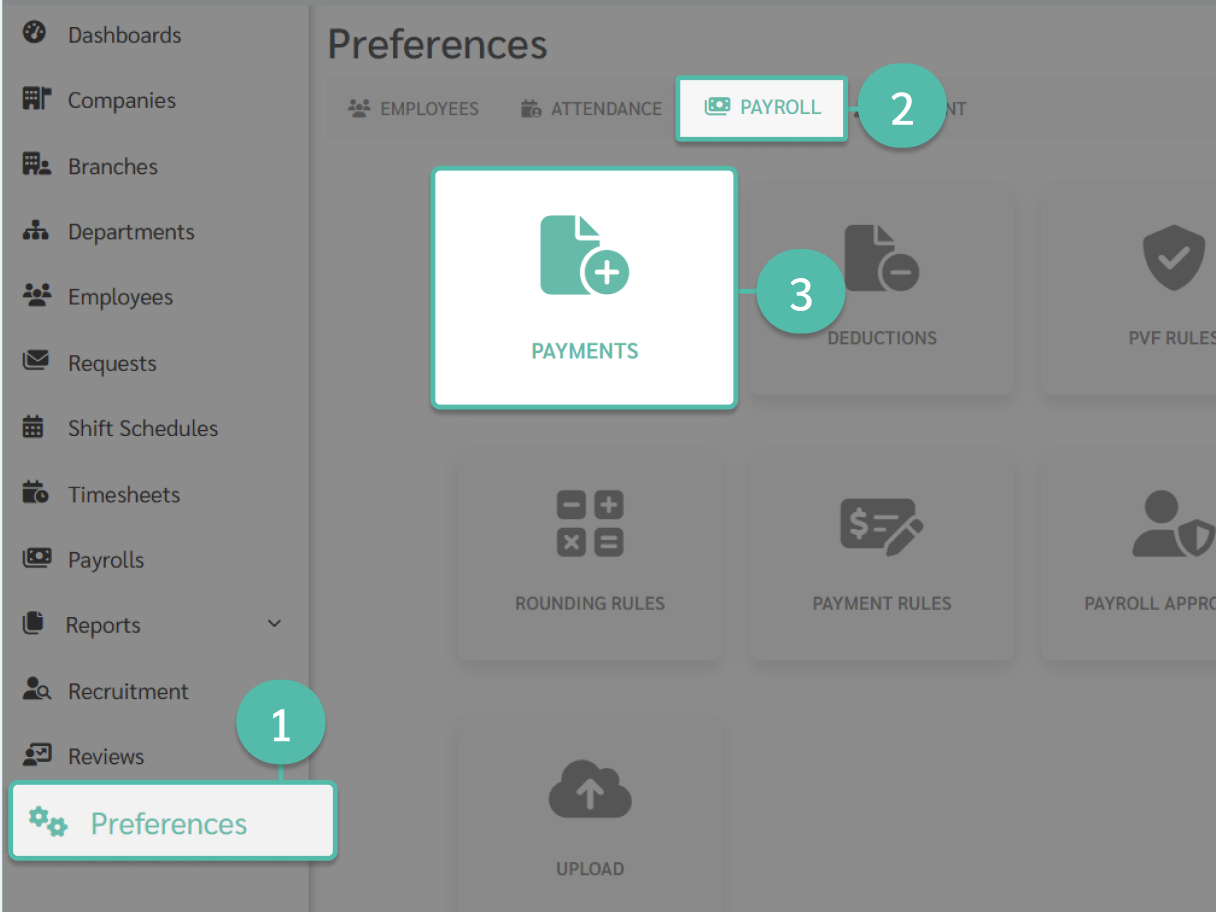
- Click Preferences
- Select the Payroll tab
- Click Payments
Payment Details
-
Name
Enter the payment type name.
- The name must not duplicate an existing payment type
- The name must not duplicate any deduction name
- If the system displays a duplicate name warning, please check whether the name already exists
- The payment name must not contain special characters, such as :
-
Payment Configuration
This section allows admins to configure how each payment type is treated within the payroll.
-
Branch
Select the branch where this payment type is applicable. Branches that are not selected will not be able to add or upload this payment type during payroll processing.
Settings
-
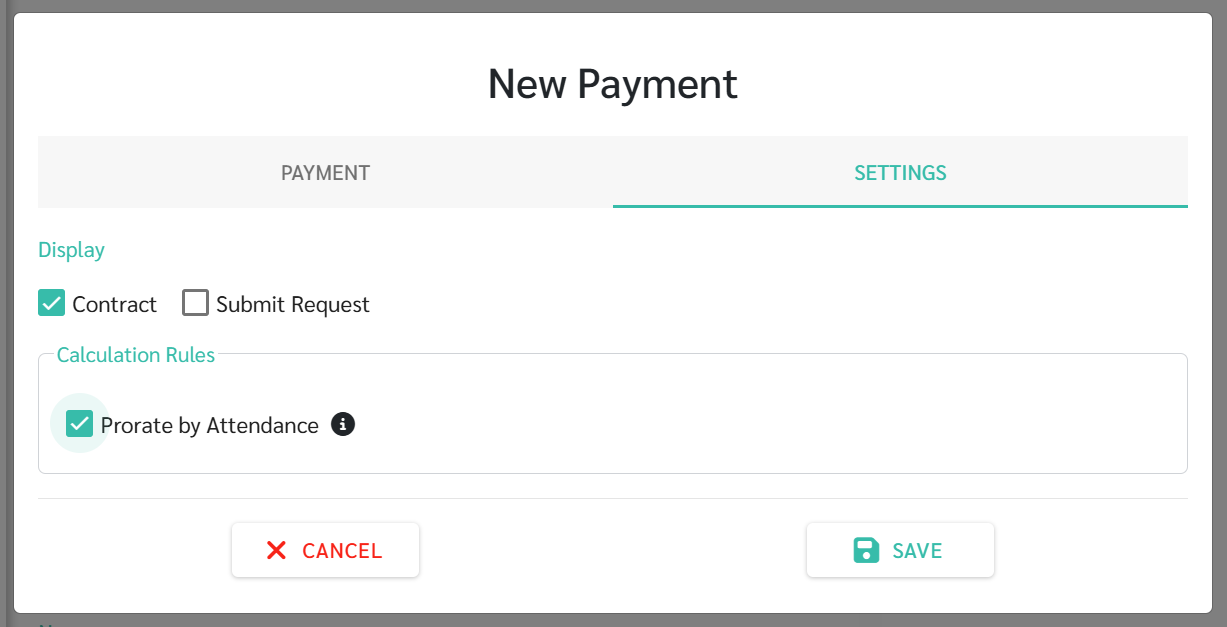
Contract
Select this checkbox if you want this payment type to appear as a regular payment option in the employee contract.
-
Prorate by Attendance
Select this checkbox if you want the payment amount to be prorated based on actual working days within the payroll period.
• Prorate Payments by Attendance applies only to payments from contract
• For allowances configured via Allowance Rule, the calculation follows the settings defined in that rule and does not use the contract prorate logic
- Submit Request

Select this checkbox if you want this payment type to appear as an option in Reimbursement Requests. When Submit Request is enabled, the following settings can be configured:
-
Max Request Amount
Select the checkbox and specify the maximum amount allowed per reimbursement request.
-
Mandatory Attachment
Select this checkbox to require employees to attach supporting documents before submitting a reimbursement request.
-
Reason Type
Select the Reason Type checkbox to require employees to specify a reason.
You can add options to the dropdown by clicking the plus (+) button, or remove options by clicking the delete (-) icon.
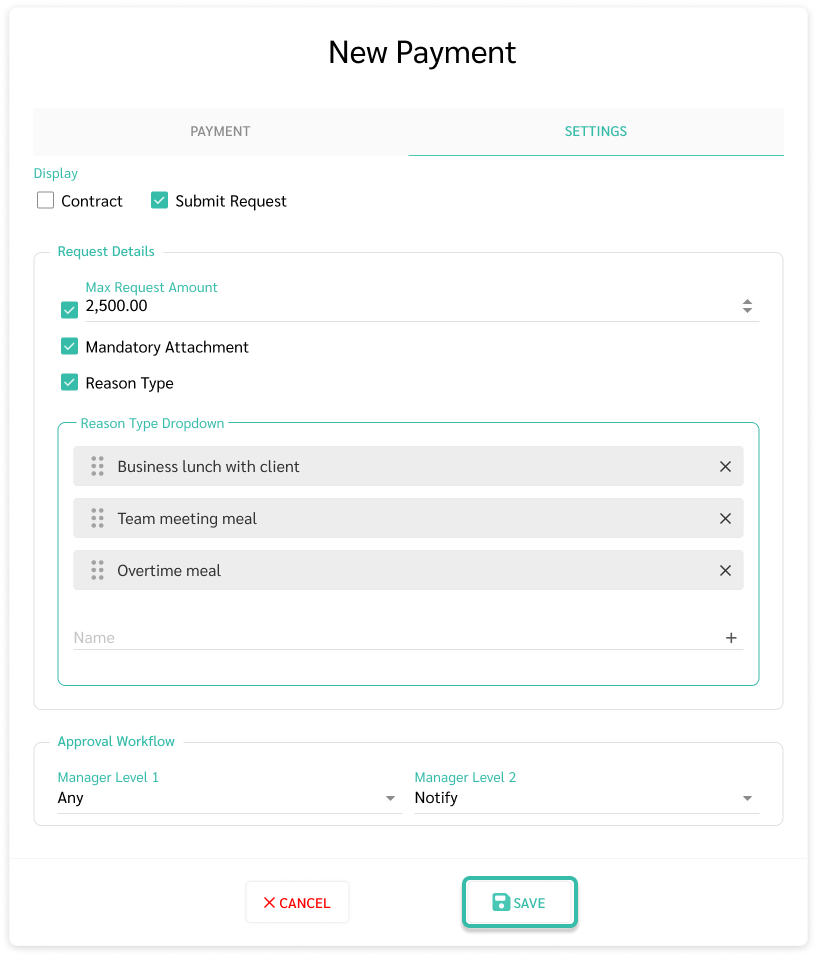

- Approval Workflow
Approval steps can be configured as follows:
-
Manager Level 1
You can define whether the request requires approval from any one manager (Any) or all Level 1 managers (All).
-
Manager Level 2
You can define whether Level 2 managers:
- Receive notification only (Notify), or
- Require approval from any one manager (Any), or
- Require approval from all managers (All)

- Tax Exemption Amount
Each payment type can be configured with a Tax Exemption Amount, an annual cap that determines how much of the payment is treated as tax-exempt for MTD calculation purposes.
How it works
Tax Exemption Amount does not make a payment fully tax-free. It sets the threshold:
- If the payment amount is within the annual cap, the full amount is excluded from MTD calculation
- If the payment amount exceeds the cap, only the portion above the cap is taxable
Example: Travel Allowance with a Tax Exemption Amount of RM 6,000/year. If an employee receives RM 8,000 in travel allowance, RM 6,000 is exempt and RM 2,000 is subject to tax.
This is different from a fully exempt payment (Taxable unchecked), where the entire payment is excluded from MTD calculation regardless of amount.

Note
- Entering RM 0.00 in the Tax Exemption Amount field is not allowed. If a payment is fully taxable, leave the Tax Exemption Amount unchecked.
- Fully exempt payments (e.g. Parking, Meal Allowance) do not require a Tax Exemption Amount. Leave Taxable unchecked and leave the field empty.
- EA Category
EA Category defines how a payment type is classified in the EA Form (Borang EA), which is the annual income statement issued to employees for tax filing purposes. Each payment type in ByteHR can be mapped to an EA Category so that the correct amounts appear under the correct sections of the form.

Note
- None — the payment is excluded from the EA Form entirely. Use this for payments that are not relevant to EA reporting.