
Overtime Compensate (Replace) to Leave Hours
Compensate Leave is a function that allows employees to request the Overtime hours to be converted into Compensatory/Replacement Leave Hours.
💬 Note
The function to convert overtime hours to leave hours allows employees to choose to receive accumulated leave days instead of overtime pay. The system automatically calculates the leave hours according to company policy.
- Step 1: Setting up Overtime Rules and Leave Types.
- Step 2: Add leave types for employees.
- Step 3: Submitting an overtime request to compensate for leave days.
- Example of calculations and details in the Timesheet
- Request Conditions
Request Conditions
Employees will only be able to submit a request if they meet the following conditions:
- Shift Schedule: Employees are required to work the shifts specified for the day.
- Auto OT is not enabled: The system must not have automatic overtime approval (Auto OT) set up for that employee.
- Request for retroactive compensation: The selected date must be a date that has already passed in the past.
- Excessive Working Hours: The system must have clock-in and clock-out times showing hours exceeding the normal shift schedule.
- Leave entitlements: Employees must have "Compensate Leave" entitlements assigned on their Employee Profile page
***In the employee's Shift Schedule Settings, the Submit OT Request must be checked***
Step 1: Setting up Overtime Rules and Leave Types.
The admin must configure the system as follows:
1. Set the multiplier in the overtime rule:
-
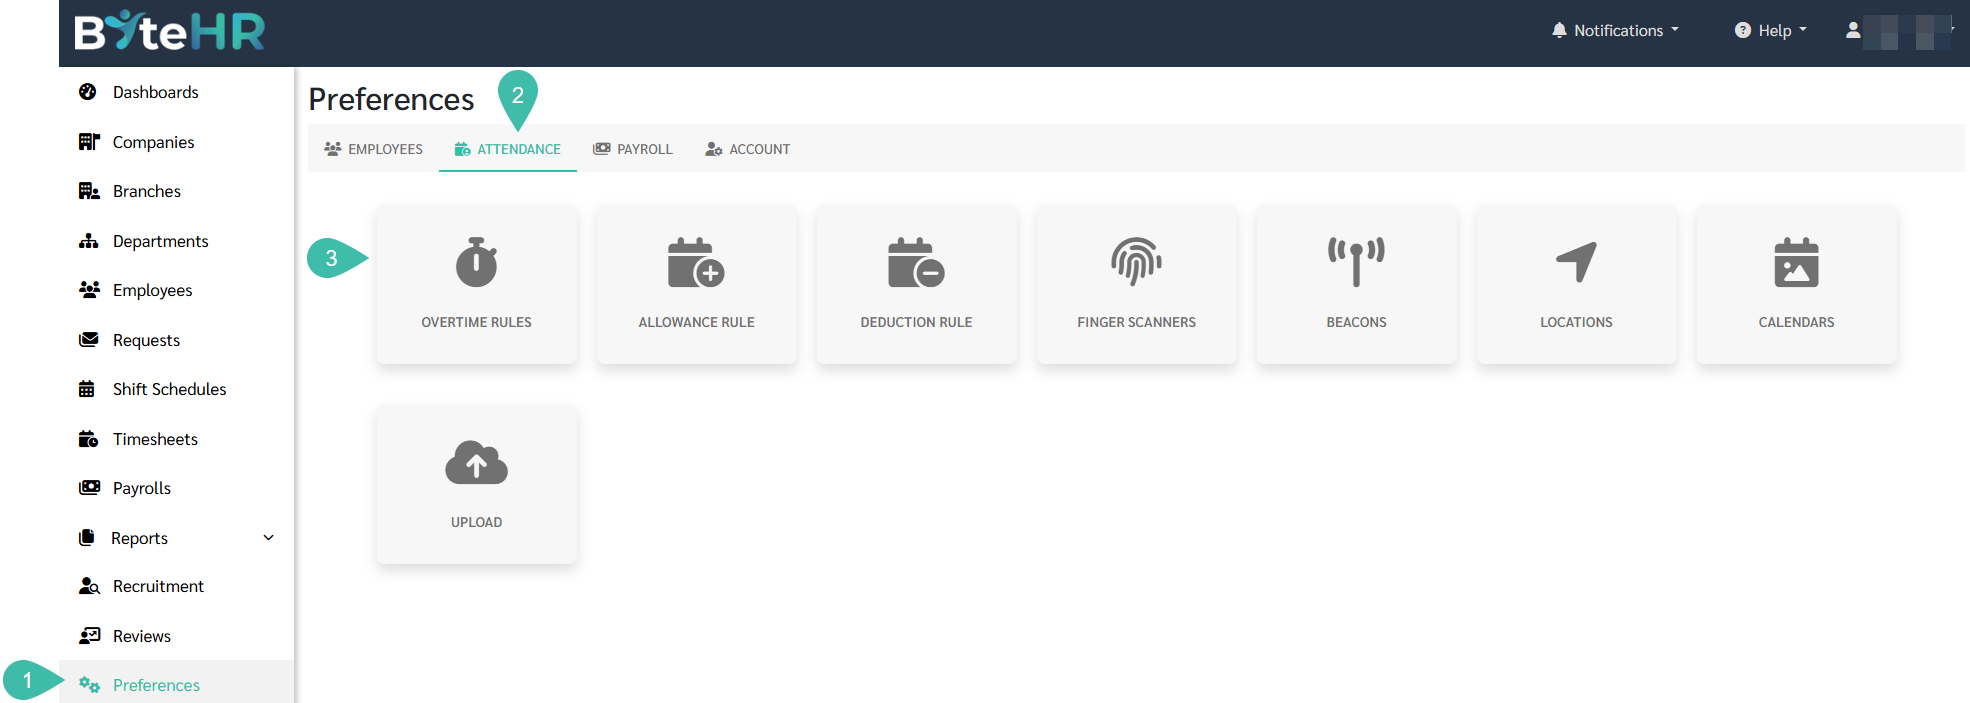
Go to Preferences > Attendance > Overtime Rules.
-
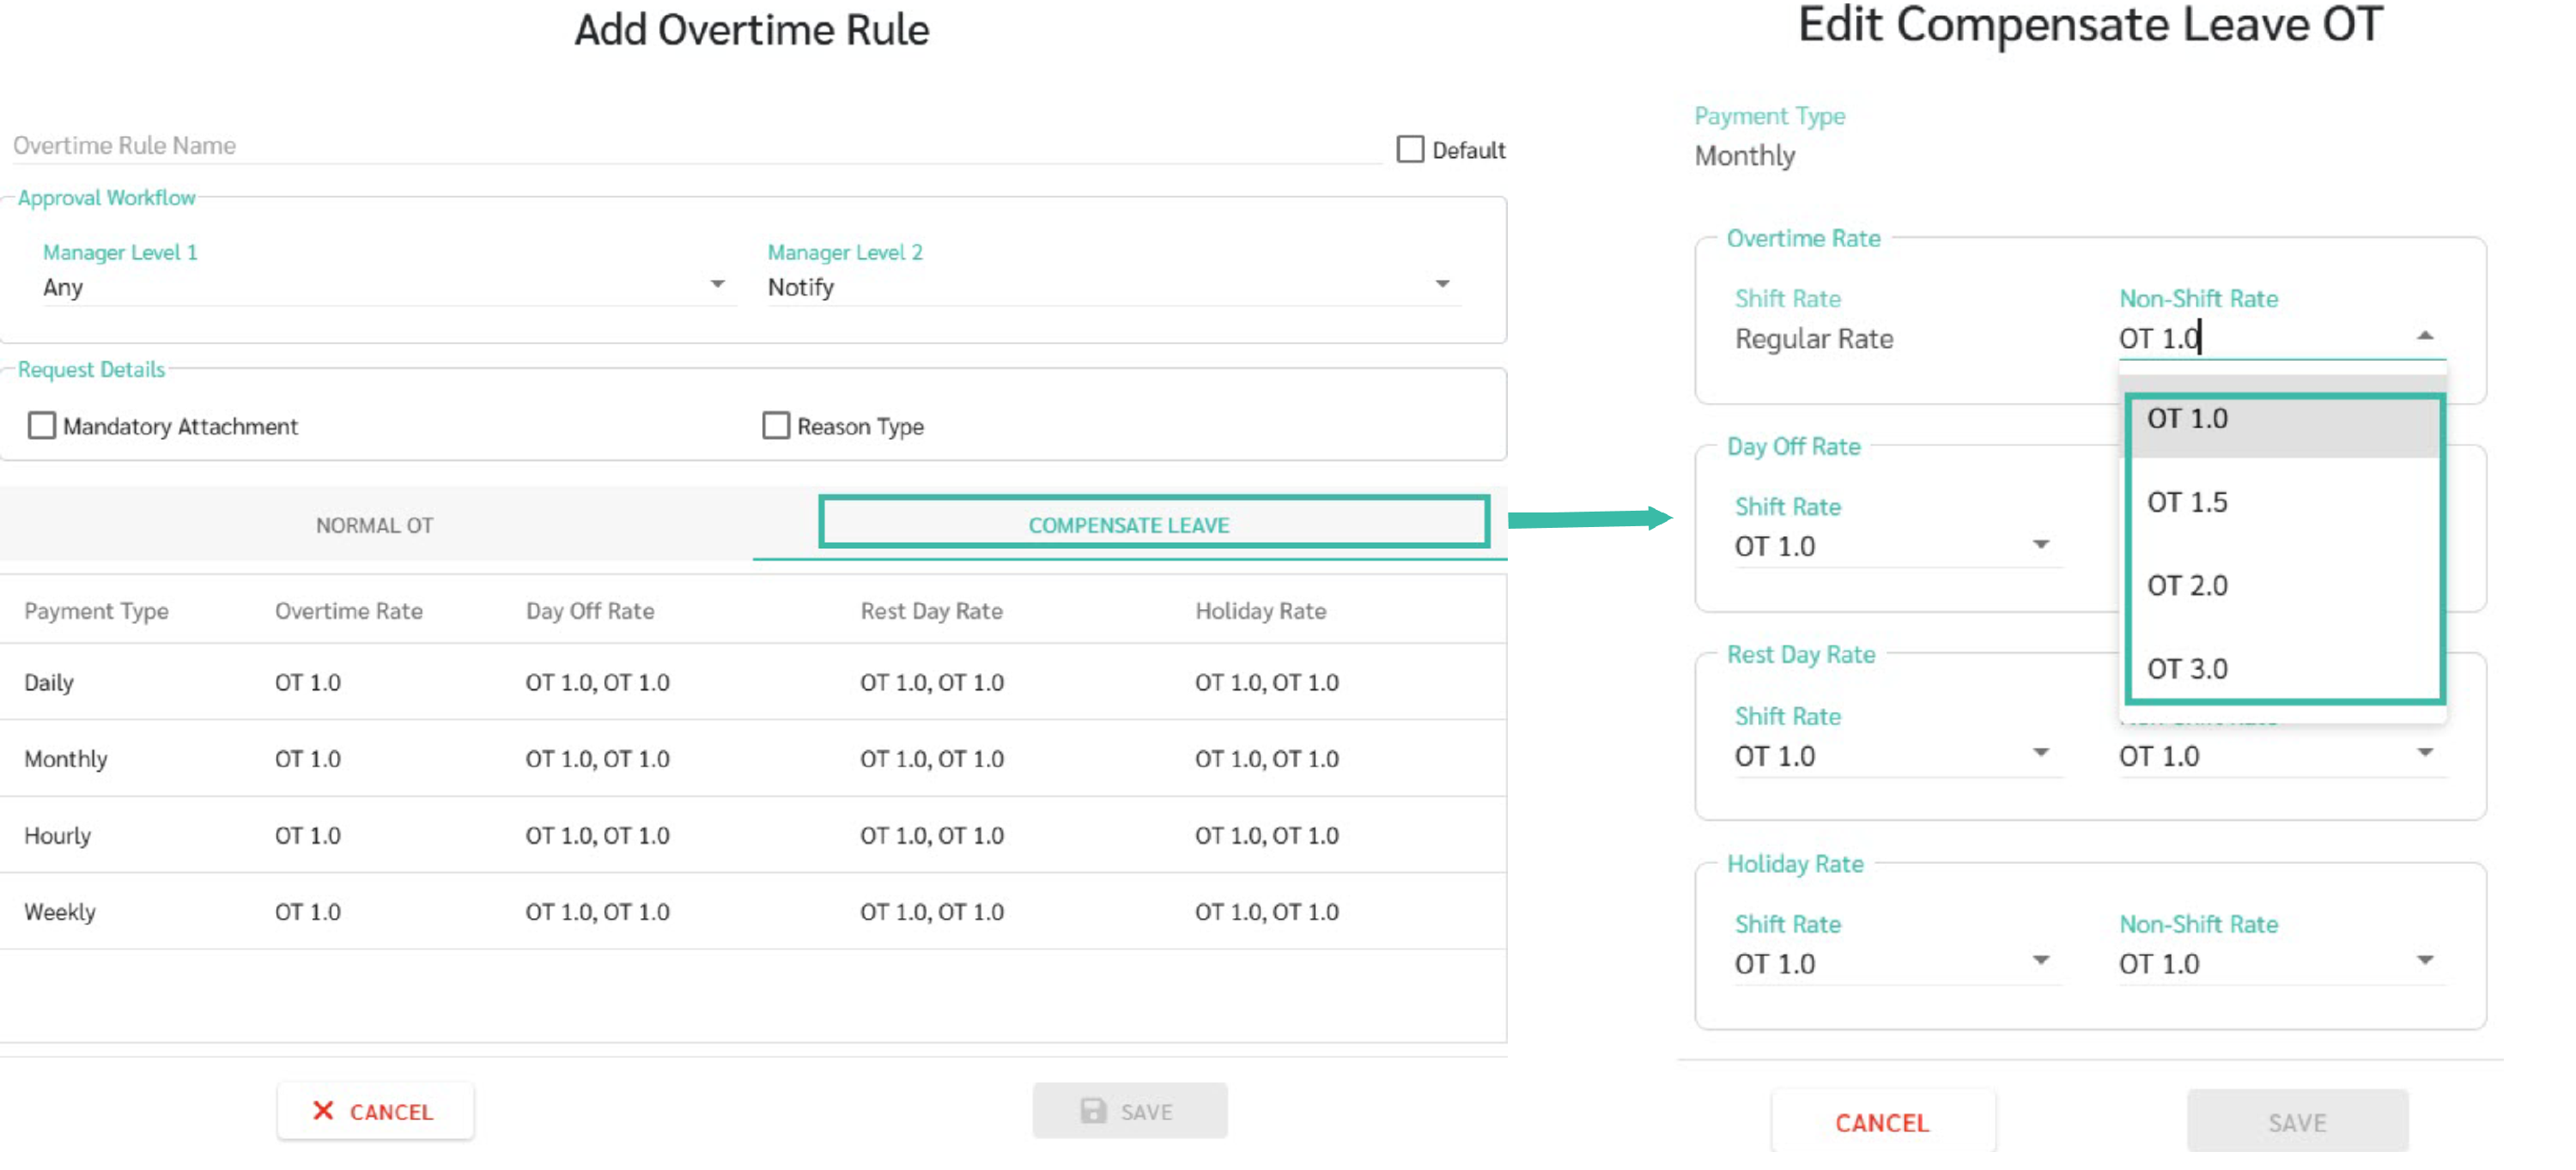
Select the Compensate Leave tab to check the multiplier rate in the Shift Rate and Non-shift Rate fields, such as 1.0, 1.5, 2.0 or 3.0 (the system will use this rate to multiply by the actual working hours to convert them into leave days).
2. Create a new leave type:
-
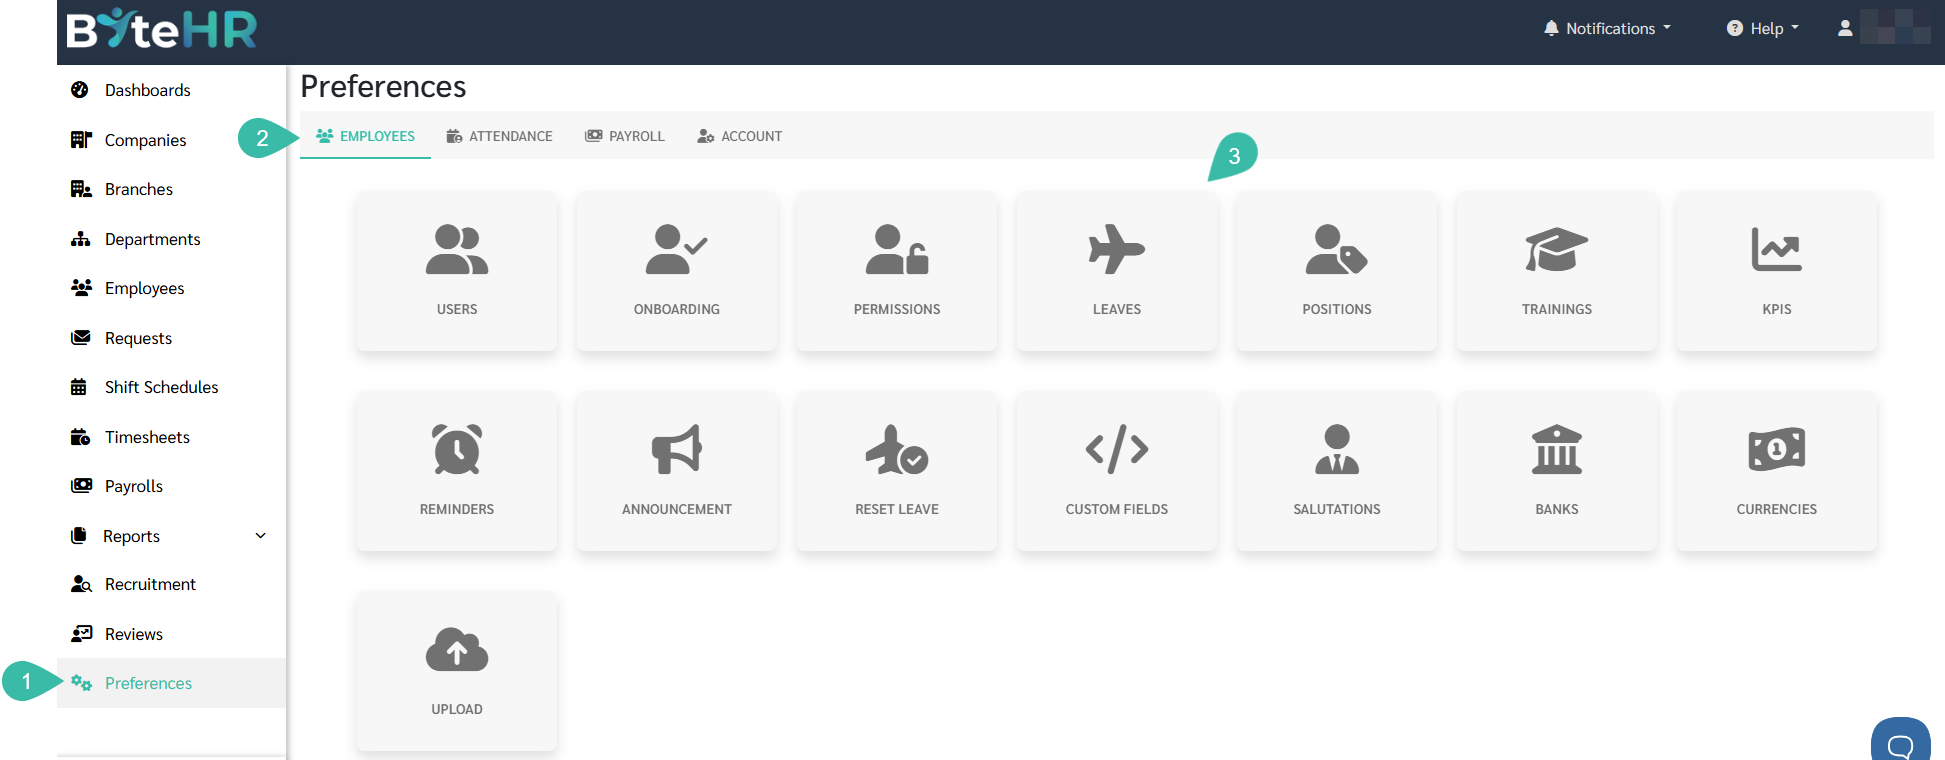
Go to Preferences > Employees > Leave > Click Add.
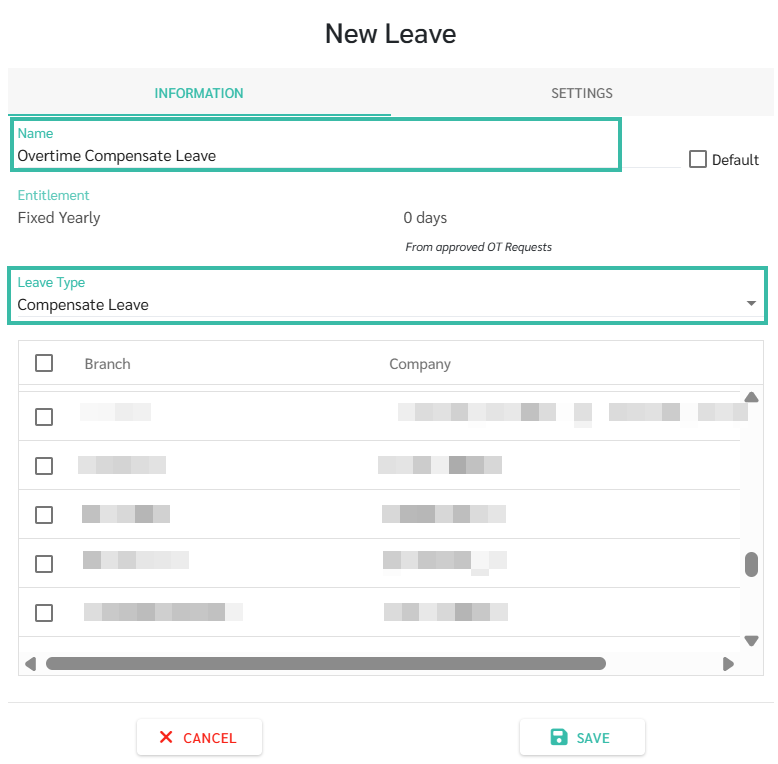
- Name your leave days, for example, "Overtime Compensation Leave."
-
Select the leave type as Compensate Leave.

Step 2: Add leave types for employees.
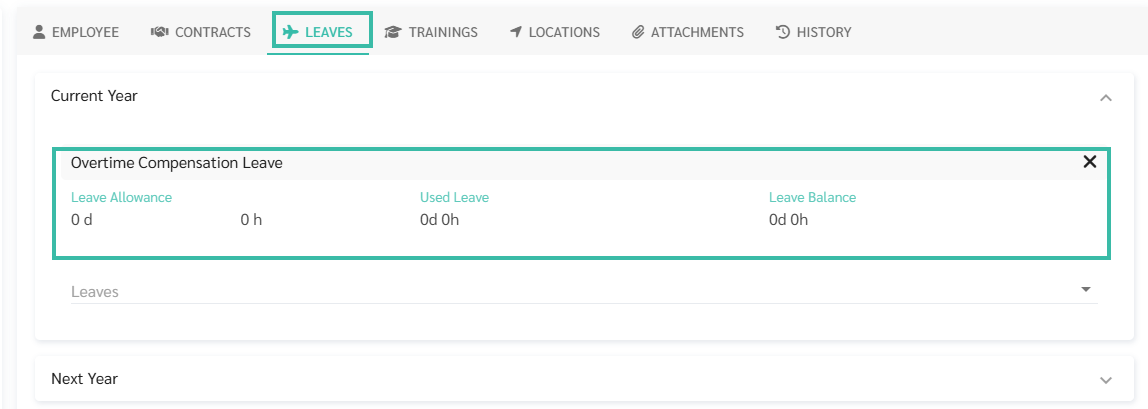
- Go to the Employee menu > Leave.
- Add the compensatory leave type that you created to the employees who need it.
- The system will display the number of entitlements and remaining balance starting at 0 days (the balance will increase when overtime compensation is approved).
For information on adding leave days to employees, see LEARN MORE.
Step 3: Submitting an overtime request to compensate for lost leave days.
Employees can submit requests through the system individually or in groups, following these steps:
Case: Create an individual request.
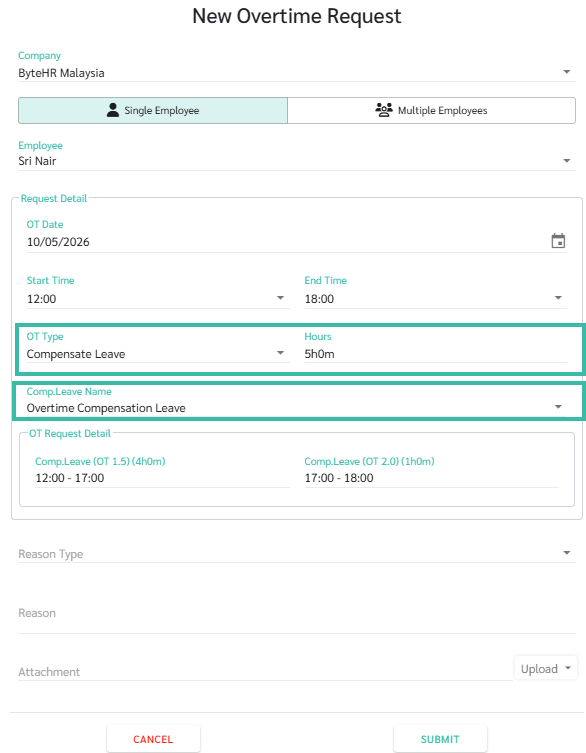
- Go to the Requests tab > Overtime > + New Request.
- Select the employee name, date, and specify the start and end times.
- Select the overtime rate type (OT Type) as compensatory leave.
- Select the desired compensatory leave type name (Comp. Leave Name).
- Please provide notes/attach documents and click Submit.
Case: Creating multiple requests simultaneously.
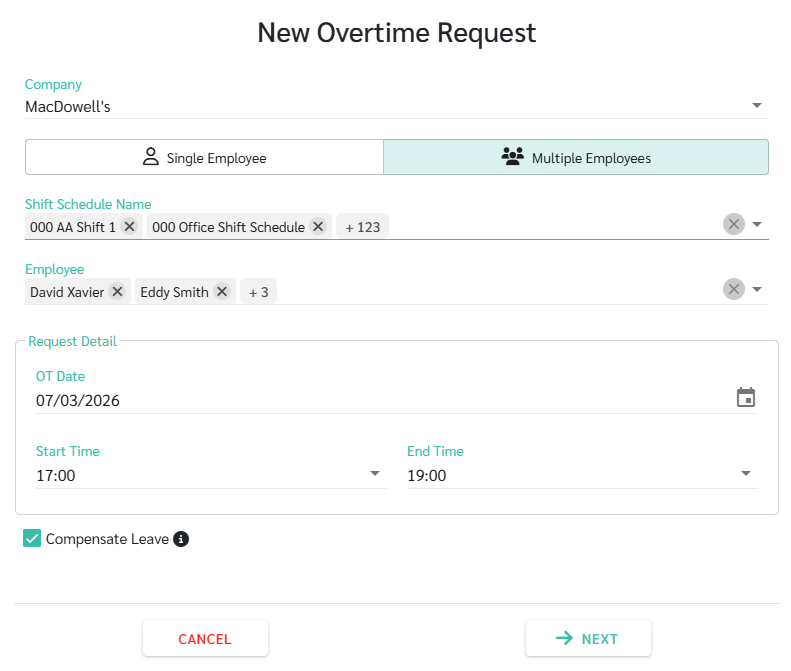
- Select the Multiple Employees tab.
- Specify the shift schedule, list of employees, and actual working dates.
-
Select the [✓] Compensate Leave checkbox to allow the system to request leave days. If no leave days are available, the system will request regular overtime instead.
-
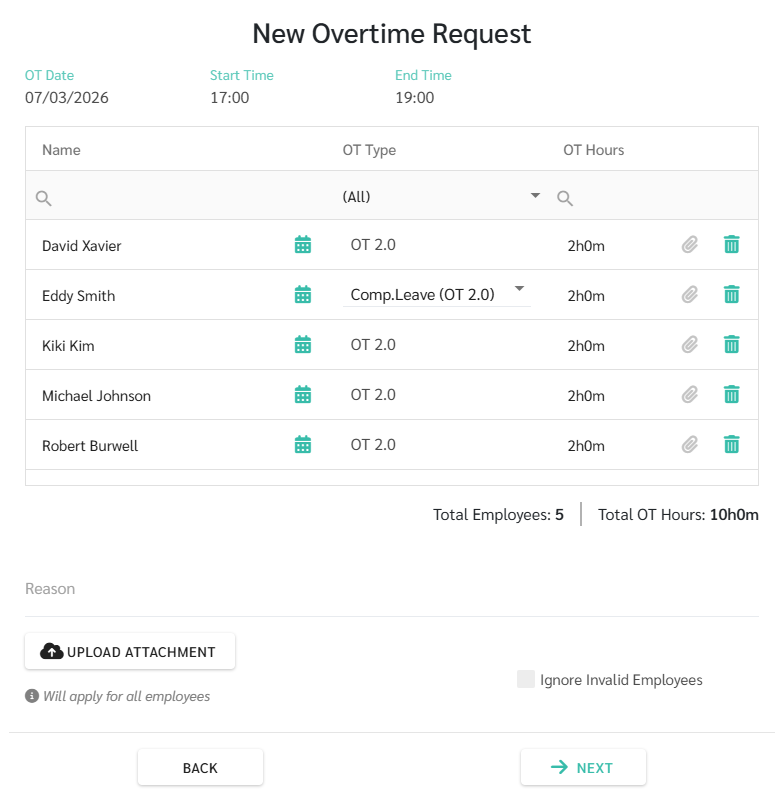
Select the desired compensatory leave name (Comp. Leave Name) for each employee.
Example calculations and details are shown in the schedule.
Example: Work shift 08:00 - 17:00 > Sign out at 20:00 (3 hours of overtime)
- If an employee requests compensation for all 3 hours of leave on a day when the overtime rate is 1.5 times the normal rate.
- The timesheet will show the actual 3 working hours in the "Comp. Leave Hours" column.
- Leave Balance: You will receive an additional 3 x 1.5 = 4.5 hours of accumulated leave.
Note 📝
- The timesheet displays the actual overtime hours worked, which can be used to track clock-in and clock-out times.
- Leave Balance: This will show the calculated leave hours after the request has been approved.