Edit Payroll
Payroll Block Details
When Payroll is generated or a Timesheet is approved, the Payroll Block will be displayed in the Payrolls tab.
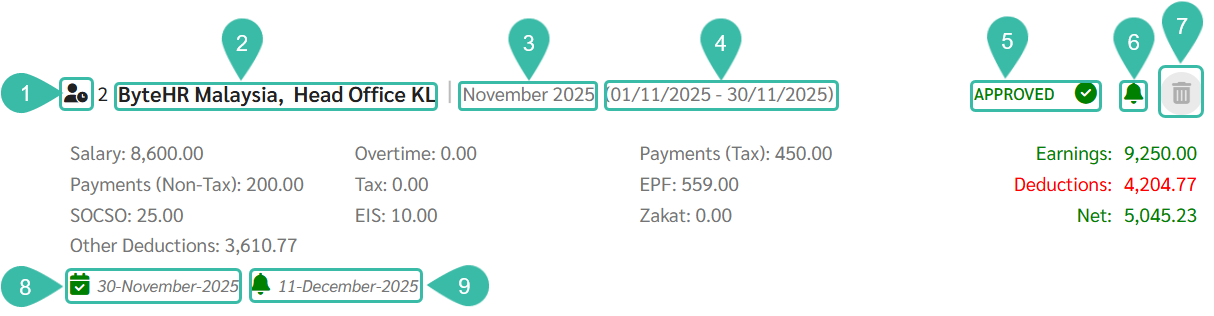
The information on the Payroll Block includes:
- The Payroll Symbol indicates the source of the Payroll Block creation.
- Company Name and Branch Name.
- Pay Period.
-
The date range for the Payroll Cycle.
*Note: This will not be displayed if it's a YTD upload for branches set to weekly or twice a month.
- The Payroll Block status shows the various status of the payroll block.
- Payslip notification status.
-
Delete button to delete the Payroll Block from the system.
*Note: The Payroll Block must be updated to Draft status before it can be deleted.
- Pay Date
- Payslip Notification Date
Payroll Symbol
|
Symbol |
Meaning |
|---|---|
|
|
It is a Payroll Block created by pulling data from employment contracts or uploading. |
|
|
It is a Payroll Block created by pulling data from Timesheet. |
|
|
This is a Payroll Block created from uploading the previous month's Payroll details (Upload YTD Payroll) or from uploading YTD data to edit Payroll information. |


Payroll Block Status
|
Symbol |
Meaning |
|---|---|
|
|
Grey means draft. |
|
|
Yellow means pending approval. |
|
|
Green means it has been approved. |


Payslip Notification Status
|
Symbol |
Meaning |
|---|---|
|
|
Grey means that the payslip has not yet been notified (Not Notified). |
|
|
Yellow means the notification is scheduled. |
|
|
Green means the payslip has been notified. |


How to Edit Payroll
-
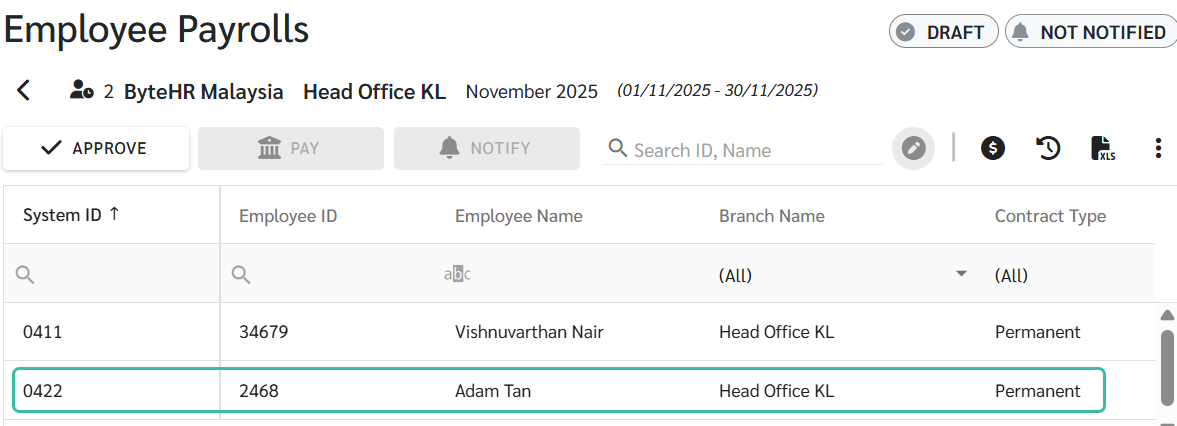
Admins can check or edit the salary amount, Payments, and other Deductions by clicking on the desired Payroll block.

-
Then click on the name of the employee whose information you want to check/edit.
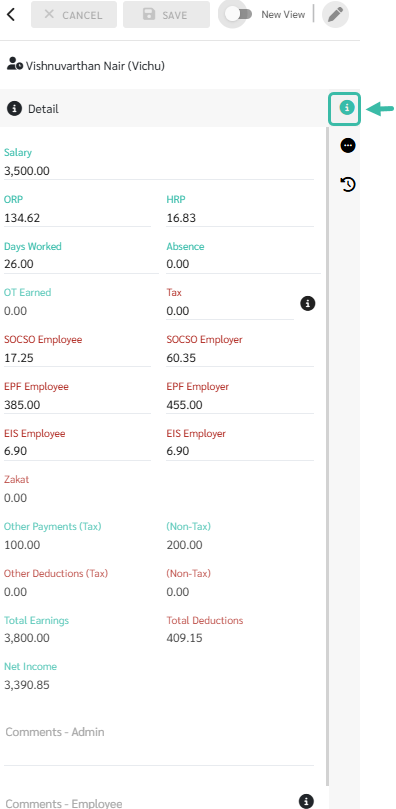
- In the Details tab, you can check details such as Salary, Overtime, Payments, Deductions, Statutory Deductions, and Employer Contributions. If you need to edit, you can modify the relevant fields (except for fields that are automatically calculated by the system, which will be marked with a red "Do not edit" symbol and cannot be edited).
-
Old view
-
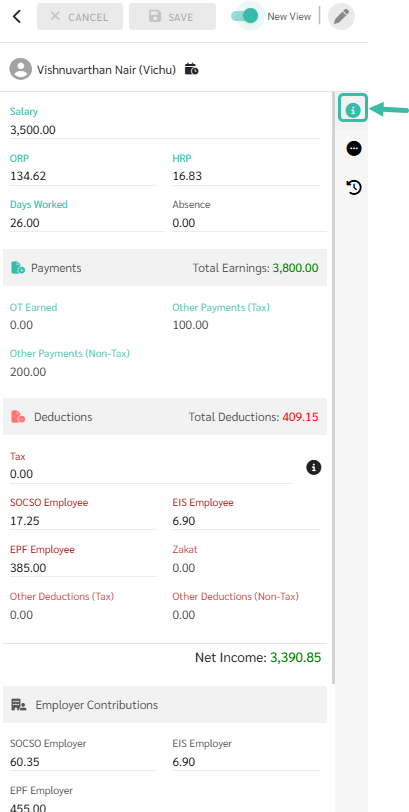
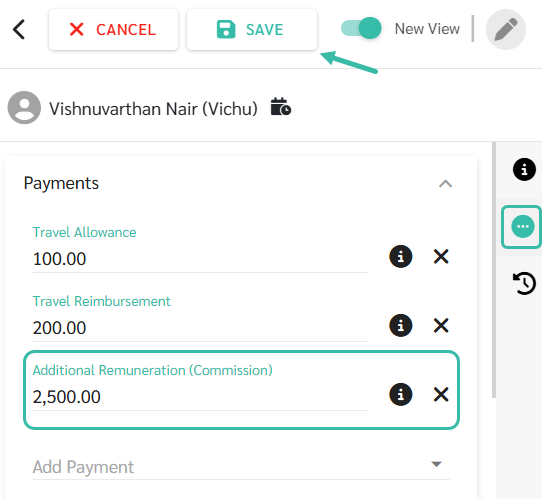
New View will be displayed when Toggle is enabled.

-
-
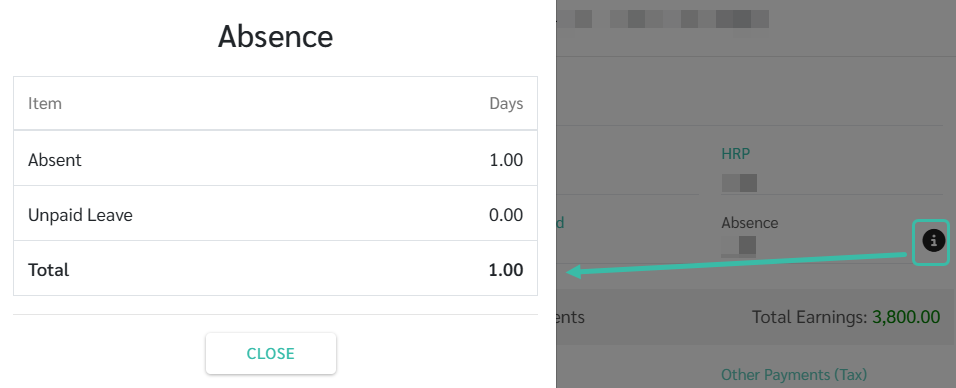
For the Absence, you can click on the (i) button to view the number of Absent Days and Unpaid Leave.
In case of editing the Absence fields, the system will increase/decrease the number in the Absent Days field in the pop-up.
- You can specify comments in the Payroll Details tab.
- Notes that only the admin team needs to see should be placed in the Comments - Admin section.
-
Please specify any notes you want employees to see on their payslips in the "Comments - Employee" section.

- If you want to add on additional Payments, other Deductions or OT, click on the Related tab. Then you can add items by clicking on the Drop Down and selecting the desired item and entering the amount.
-
When you have successfully edited the information, press Save.
-
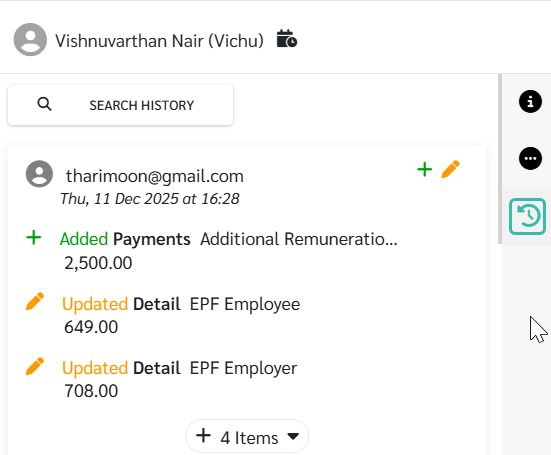
You will be able to view all the changes made in the Employee Payroll details in the History tab.


📃 Note
- For basic employee information such as department and position, the payslip will use the information from the time the Payroll was generated.
- Therefore, if Payroll has been generated and employee personal information is modified retrospectively, the payslip will still display the old information.