Upload Employees
Upload Employees are divided into two types:
- Upload New Employees
- Upload Data for Existing Employees
Upload New Employees
Upload New Employees template is used to add new employees to the system.
- Upload New Employees can be done in two ways:
- Employees tab.
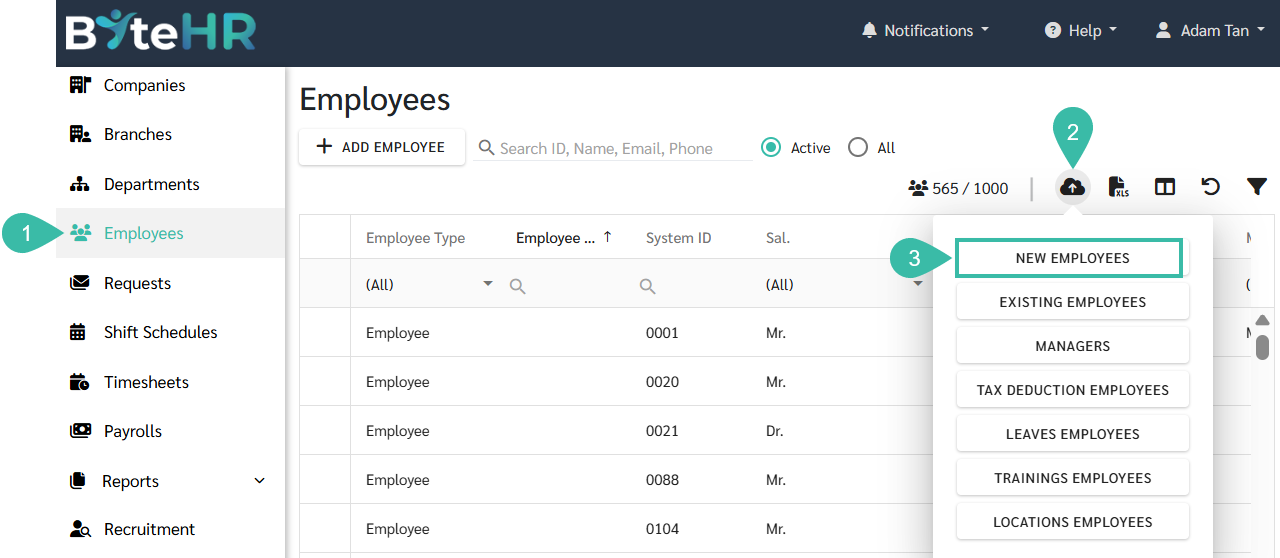
- Go to the Employees tab.
- Click the Upload Employees icon.
-
Select New Employees and the system will redirect you to the Upload New Employees page.
- Preferences tab.
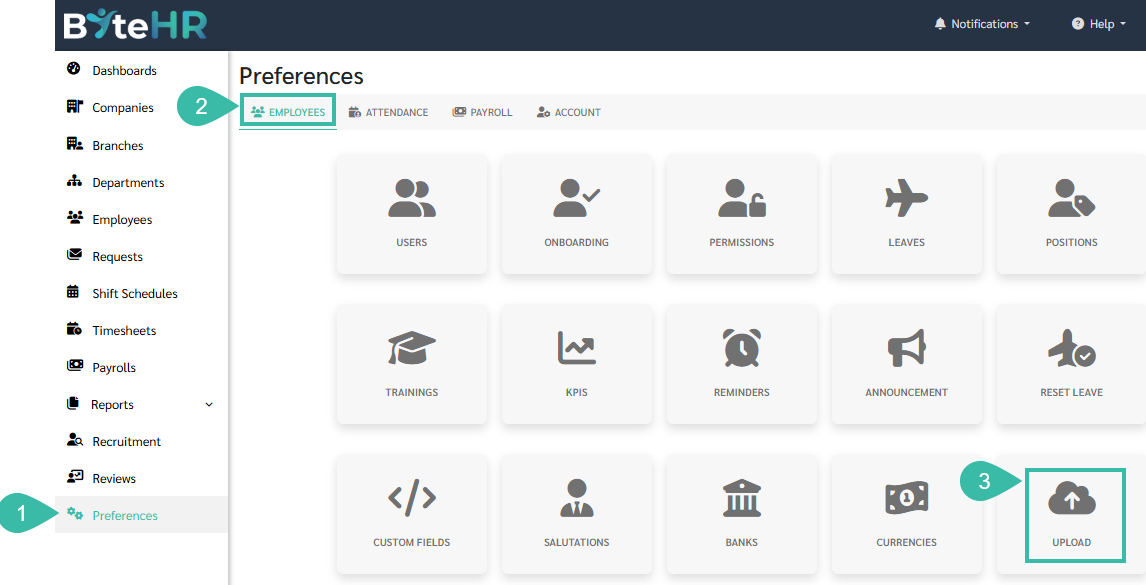
- Head over to the Preferences tab.
- Click Employees.
-
Select Upload.
-
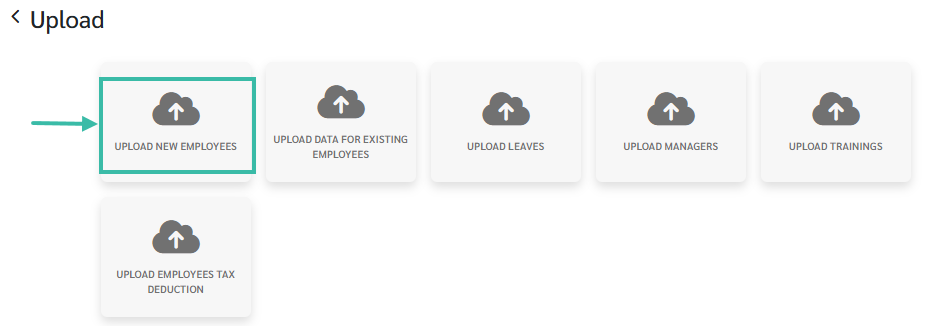
Choose Upload New Employees and system will redirect you to the Upload New Employees page.
- Employees tab.
-
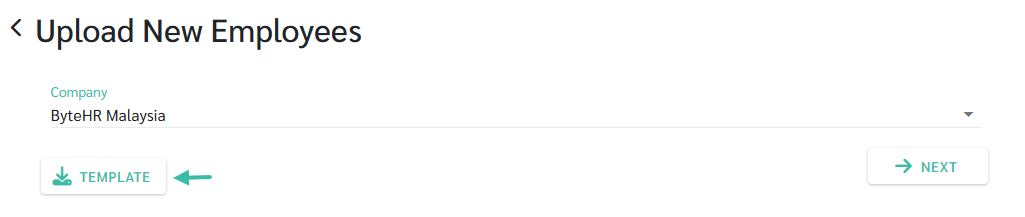
In the Upload New Employees page, click Template to download the Upload New Employees template.
-
Fill in the details in the template and save the file.

Note
- To change the Employee ID, enter the System ID in the first column, then enter the desired Employee ID in the next column.
- The fingerprint Scan ID in the system cannot be duplicated.
- Email addresses in the system cannot be duplicated.
- Required fields include: Branch, Salutation, First Name, Last Name, House No, Sub District, District, City/Town, Postal Code, Country.
- For eCheckin, enter Y and use a fingerprint Scan ID, such as 1234. Upon successful upload, the fingerprint code in the employee details will display as 1234.
- If eCheckin is entered as Y and no fingerprint Scan ID is entered, upon successful upload, the fingerprint code in the employee details will display the same number as the system ID.
- If eCheckin enters N but a fingerprint Scan ID such as 1234 is included, after successful upload, the fingerprint code in the employee details will display as 1234.
- If eCheckin enters N and no fingerprint Scan ID is provided, the fingerprint code in the employee details will not be displayed after successful upload.
- If you enter a Start Date but do not enter a Probation End Date, the system will automatically calculate the probation end date, with the default being 119 days.
- Once the template is completed, in the Upload New Employees page:
- Select the company you would like to continue the Upload New Employees.
-
Click Next.

-
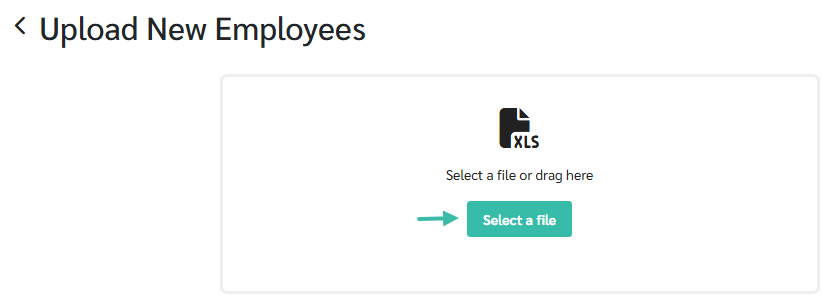
Select File to upload the completed template.
-
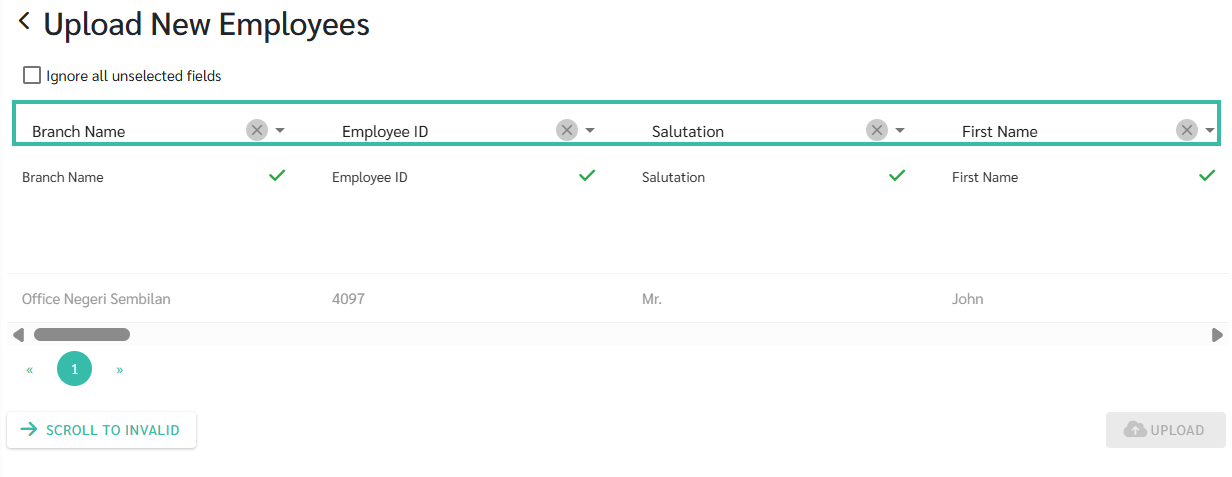
Match the fields accordingly.
-
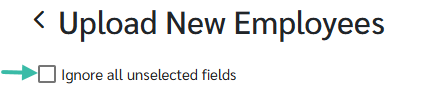
If you click "Ignore all unselected fields," the system will skip the fields that do not have matching data.
-
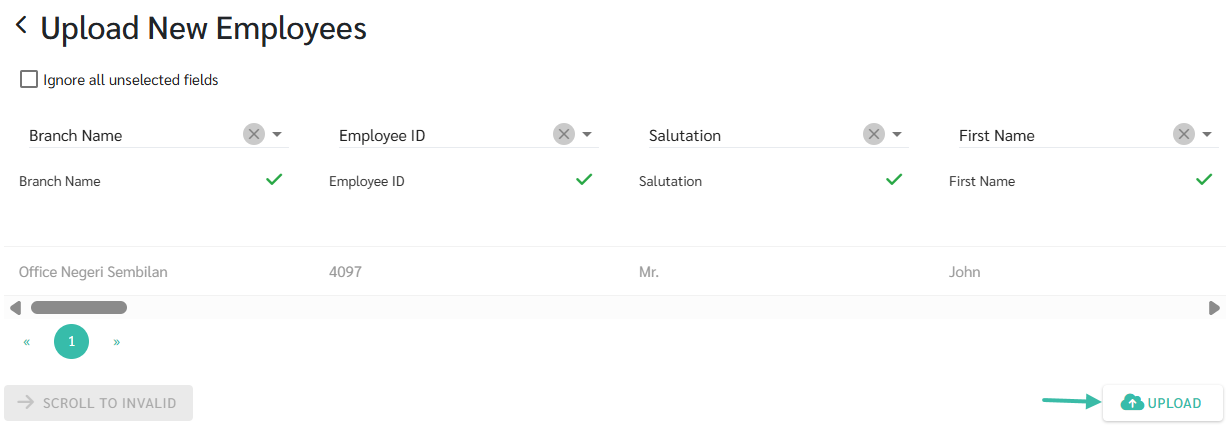
Click Upload. The system will create a new employee with the information specified in the uploaded file.


Upload Data for Existing Employees
Upload Data for Existing Employees is used to edit various information for existing employees.
- Upload Data for Existing Employees can be done in two ways:
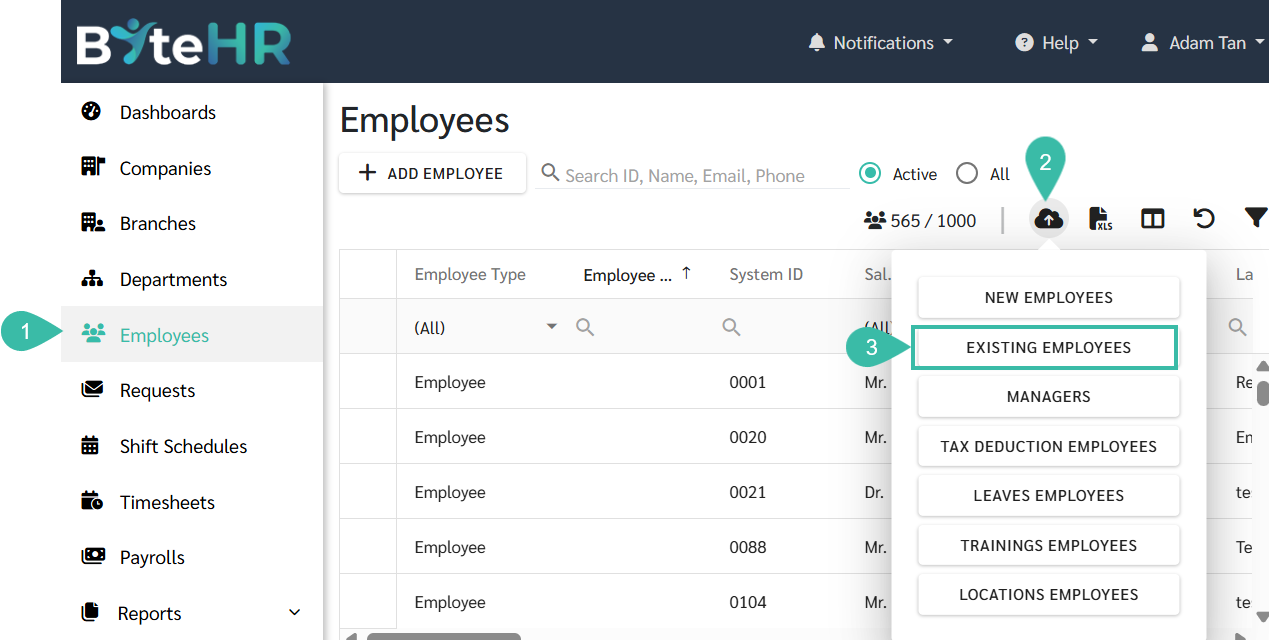
- Employees tab
- Go to the Employees tab.
- Click Upload Employees icon.
-
Select Existing Employees and the system will redirect you to the Upload Data for Existing Employees page.
- Preferences tab
- Navigate to the Preferences tab.
- Click Employees.
-
Select Upload.
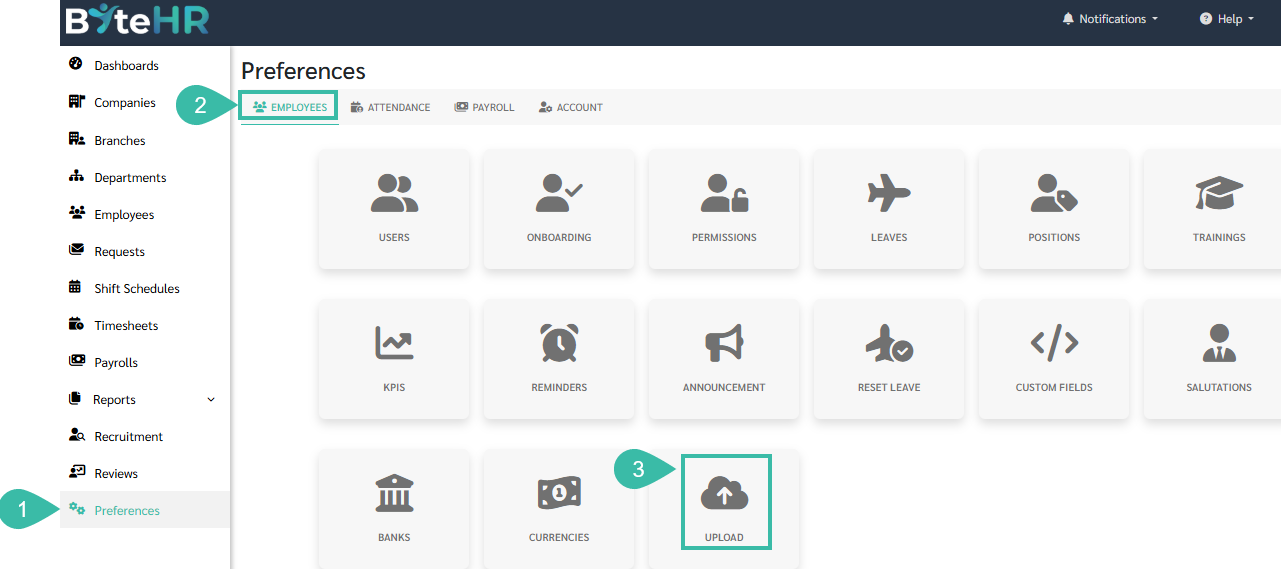
-
Choose Upload Data for Existing Employees and the system will redirect you to the Upload Data for Existing Employees page.

- Employees tab
-
Click Template, to download the template.
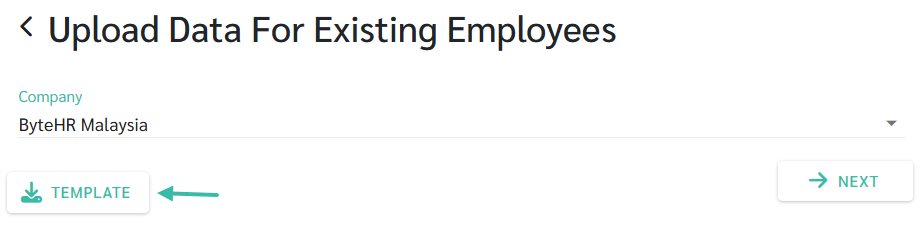
-
Fill in the details in the template and save the file.

- It is not possible to upload the data of employees whose contracts have ended (Ex-Employee).
- The Applicant's information cannot be uploaded.
- It is not possible to edit an employee's branch by uploading their information.
- The newly uploaded information will replace the existing information in the latest employment contract. This can be used to edit employee details such as start date, address, or adjust salaries.
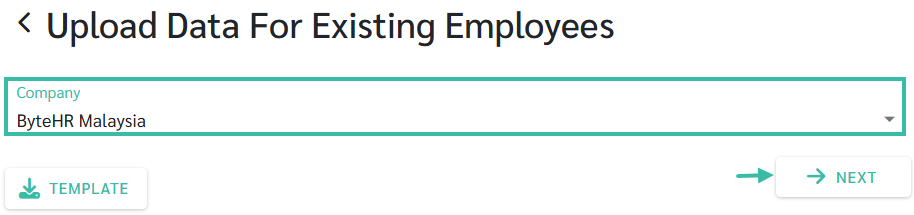
- Once the template is completed, in the Upload Data For Existing Employees page
- Select the company you would like to upload data for existing employees.
-
Click Next.
-
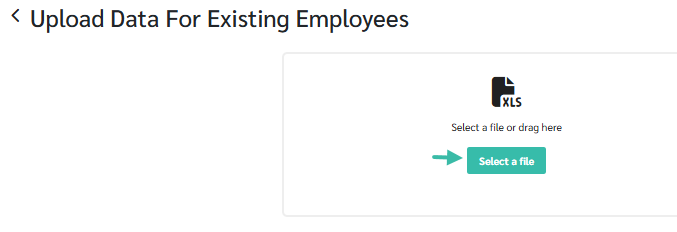
Select the file to upload.
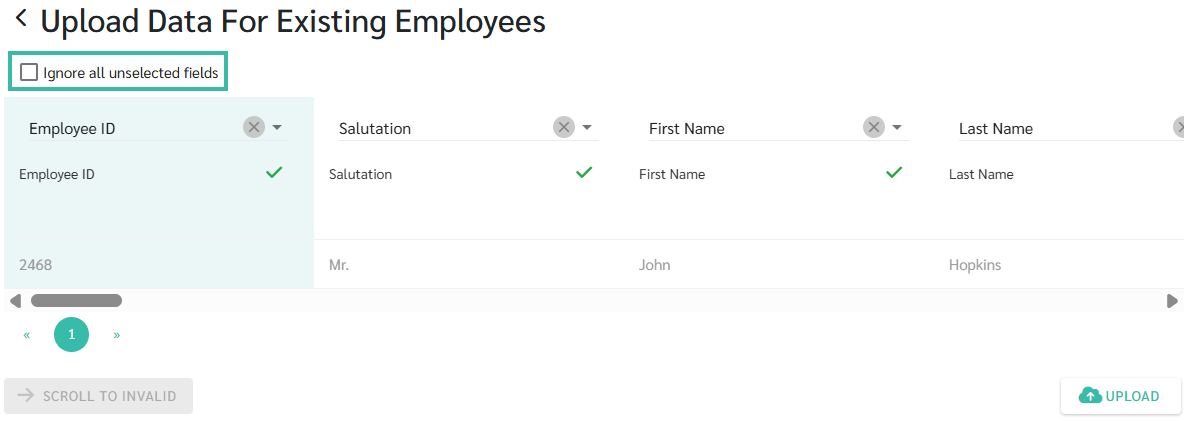
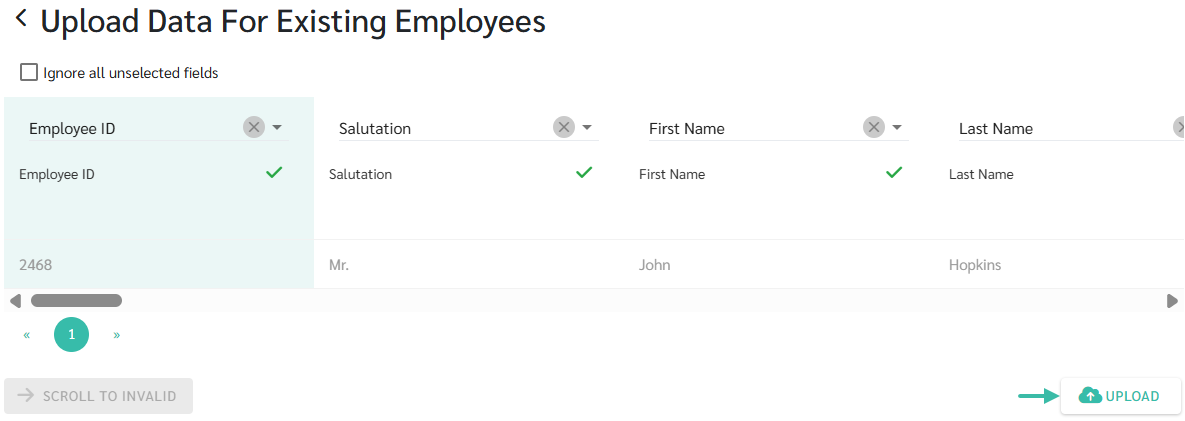
- Match the fields accordingly.
-
If you click "Ignore all unselected fields," the system will skip the fields that do not have matching data.
-
-
Click Upload.


Note
- You cannot update employee photos by uploading them via a template. Employee photos can only be added directly from the Employee Details page in the Employees menu.