Set eCheckin GPS type in Branch
The administrator can set up GPS-based timestamp by following these steps:
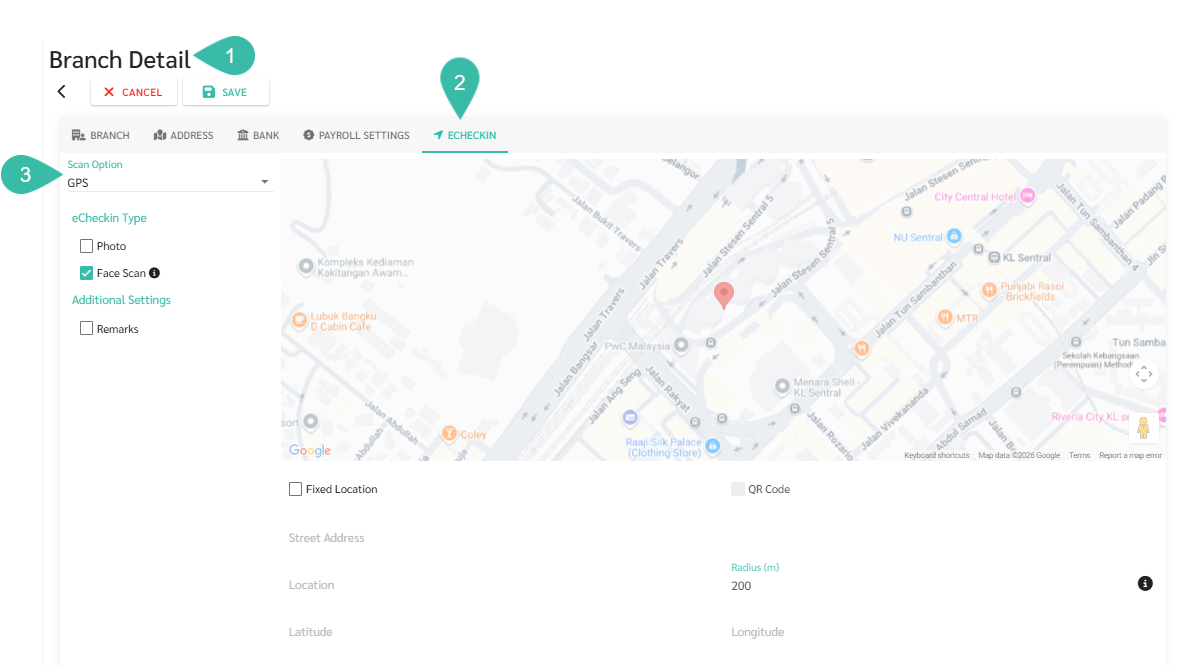
- Go to the desired branch (Branch) for configuration.
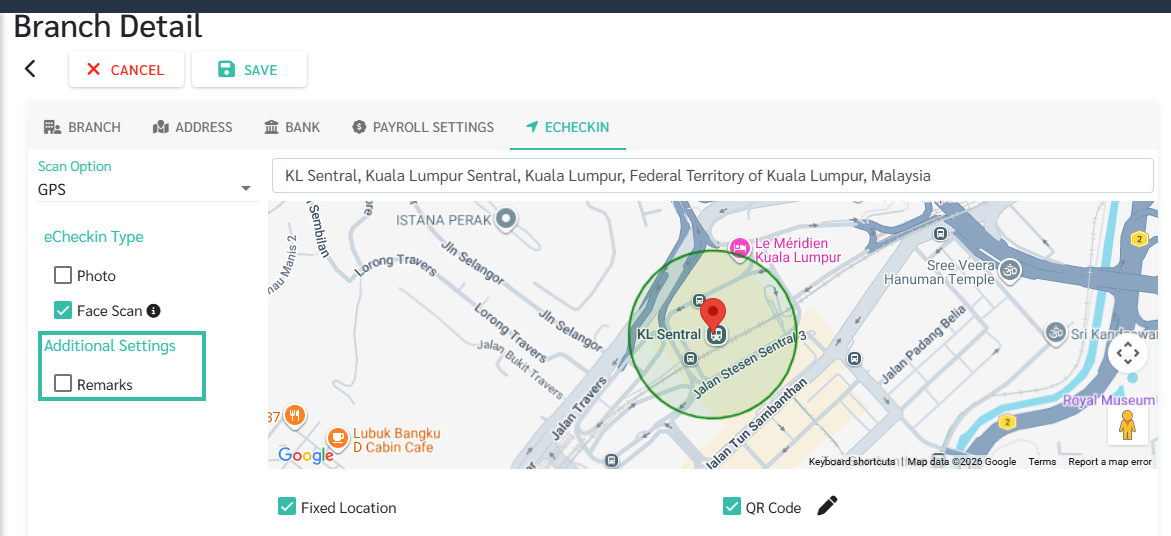
- Go to the eCheckin tab.
- Select GPS as the Scan Option.
-
Select the desired scanning conditions to enable or disable.
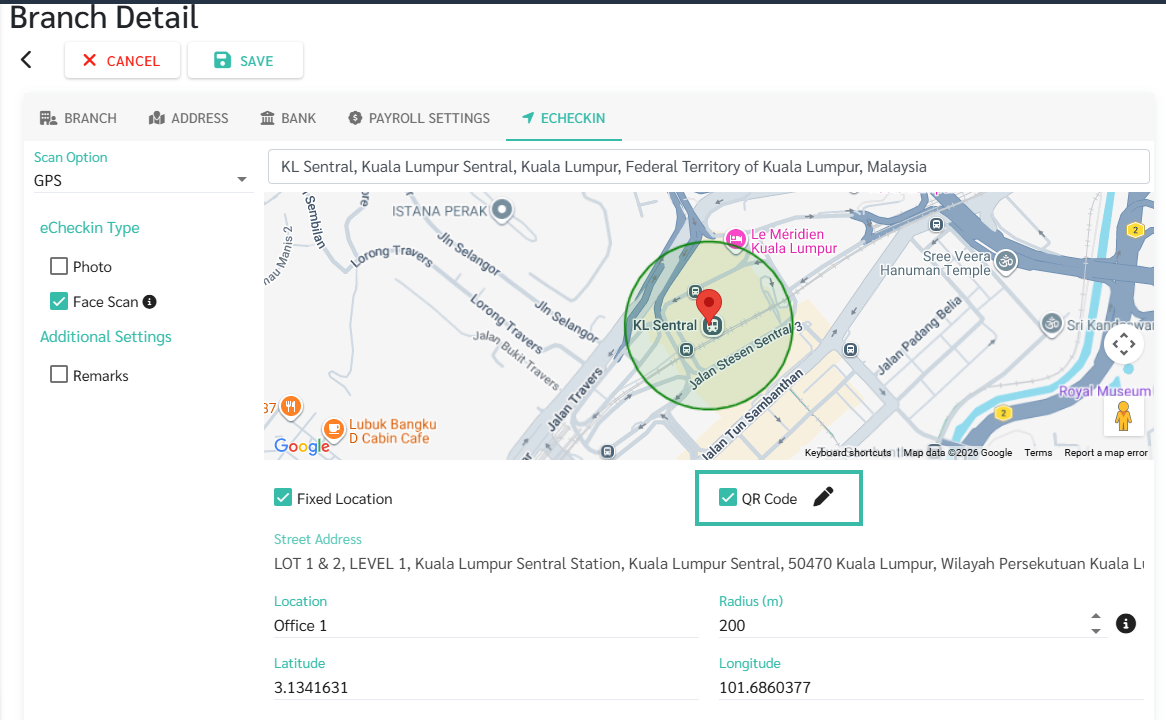
- To set a Fixed/ Open Location:
- Fixed Location
- This setting allows you to define a precise location, specifying a horizontal radius.
- Sign in/out will be successful if the employee logs in or out within that radius.
- The required information for a Fixed Location includes:
- Latitude
- Longitude
- You can search for the desired location in the search box above.
-
Clicking on a location will automatically provide the latitude and longitude.
Additionally, you can use the mouse to move the pin.

- To specify the desired location.
-
Radius:
The radius within which employees are allowed to press the Sign in/out button.
The system will display the defined radius on the map.
*Note: The radius should not be less than 100 meters.
-
Location/Location Name:
You can specify the location name to be displayed when employees clock in.

-
-
Open Location
If Fixed Location is not enabled, employees can clock in anywhere (Open Location).

- Fixed Location
- QR Code:
- This feature allows employees to scan a QR code to sign in/out.
- Fixed Location services must be enabled first, and employees must be within a specified radius to scan the QR code.
-
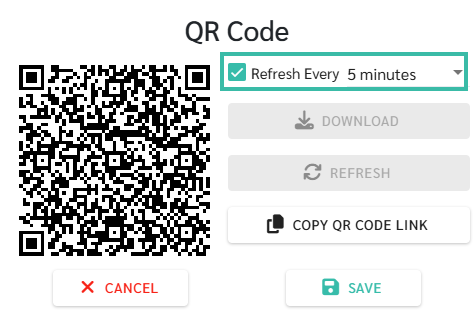
Once the QR code is enabled, the administrator can press the Edit button to display the QR Code.
-
The administrator can download the QR code or refresh the QR code.

-
The system can be set to automatically refresh the QR code every few minutes (this can be configured).
If the system is enabled to automatically refresh QR codes, it will generate a link instead of downloading the QR code image.
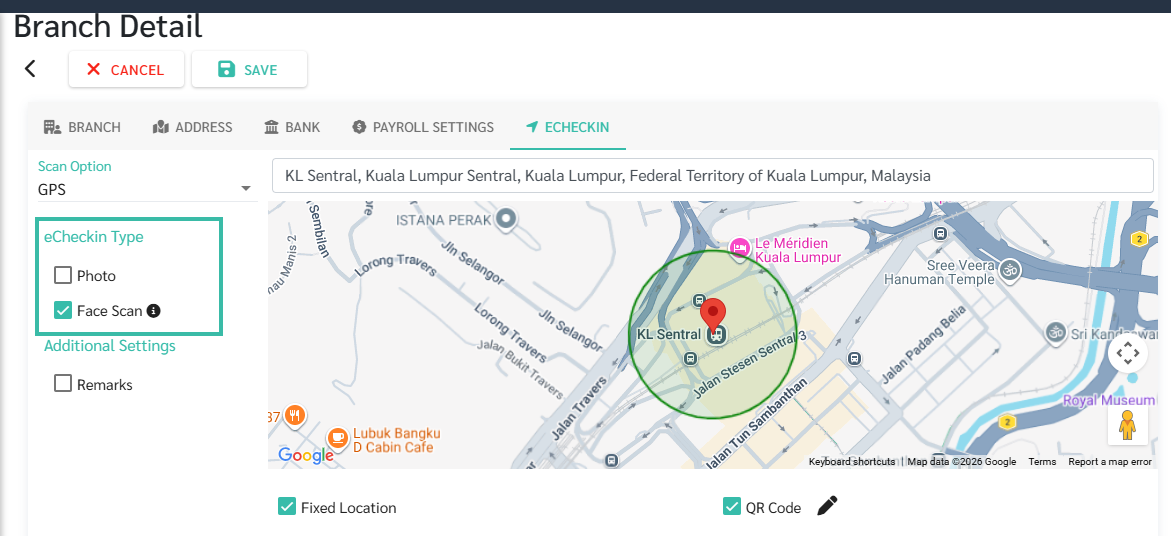
- eCheckin Type
- Photo:
- This setting allows employees to take a photo when they sign in/out.
- The system will automatically open the phone's front camera when the employee signs in/out.
- Face Scan:
- This setting requires employees to scan their face when signing in/out.
- When the face scan option is enabled, employees must set up their face scan.
- Then, when sign-in/out, the system will compare the face to the saved photo.
-
If it is confirmed to be the same person, the Sign In/Out will be successfully recorded.
*Note
When facial recognition is enabled, employees will only be able to clock in via the mobile app.
The Face Scan option cannot be enabled simultaneously with the Photo option.
If the Face Scan option is used, the system will automatically save the photo to the Location Timestamp report.
- Photo:
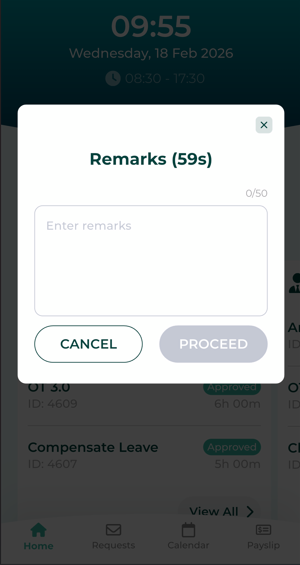
- Remarks/Additional Settings:
-
Employees can add a further explanation of up to 50 characters when signing in/out.
-
Note:
If an employee does not fill in the Remarks within 60 seconds, the system will consider the Sign In to be unsuccessful.
This information will be displayed in the report's Location Timestamp and Attendance Details sections, in the Remarks column.
-


🗨️Note
-
Multiple conditions can be enabled simultaneously.
For an employee to successfully clock in, all enabled conditions must be met. For example, enabling Fixed Location and Photo --> the employee must be within the specified radius and have a photo taken for the time to be successfully clocked in.
- To allow employees to clock in from multiple locations, you can specify additional check-in locations in the employee's profile or in Settings - Preferences - Location.
- Setting eCheckin conditions at a branch will affect the location in the employee's history, except for the QR Code conditions.
The pricing for the eCheckin - GPS feature depends on the number of staff in your package and will prorate according to your billing cycle.