Employee Payslip Setting
The admin can configure the app to allow employees to view their payslips via the mobile app as follows
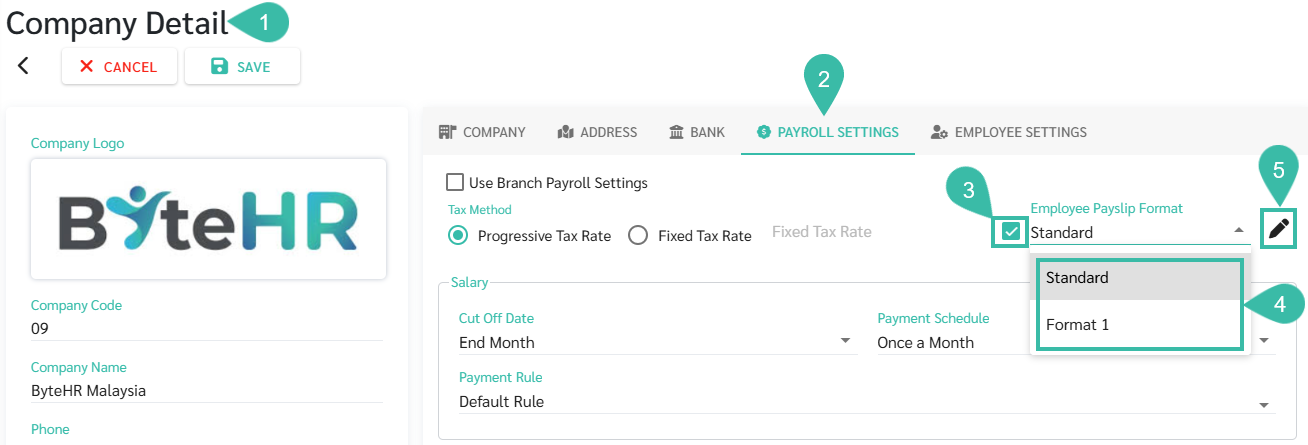
- Go to the Company or Branch.
- Go to Payroll Settings.
- Check the "Employee Payslip Format" box.
- Select the desired employee payslip format.
-
The payslip template also allows you to choose whether or not to display certain fields, and you can configure that by clicking the pencil icon.
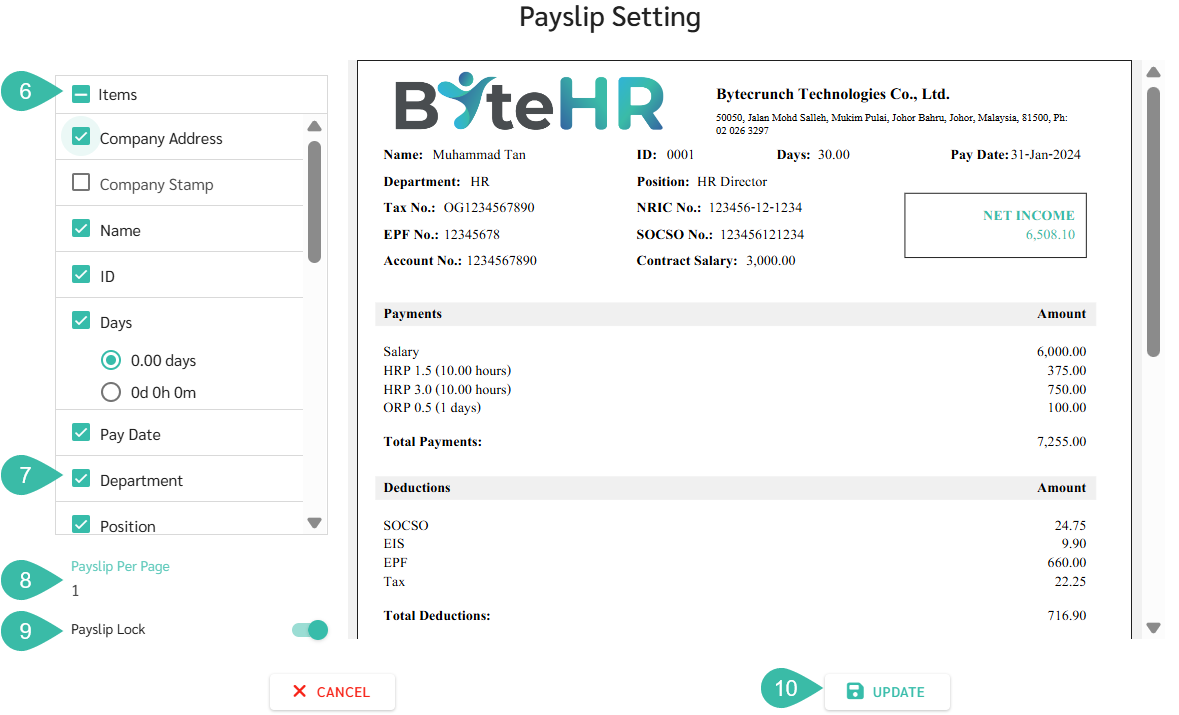
- The system will display the default payslip format based on your format selection. Uncheck the box if you do not want certain fields to be displayed.
- To change a field name, click on the field you want to change and type the new field name.
- Configure employee payslips to be displayed on a single page when generating payslips in Admin View.
- Set up a payslip lock for employees.
-
Once you have finished making changes, click Update.
- Click Save.


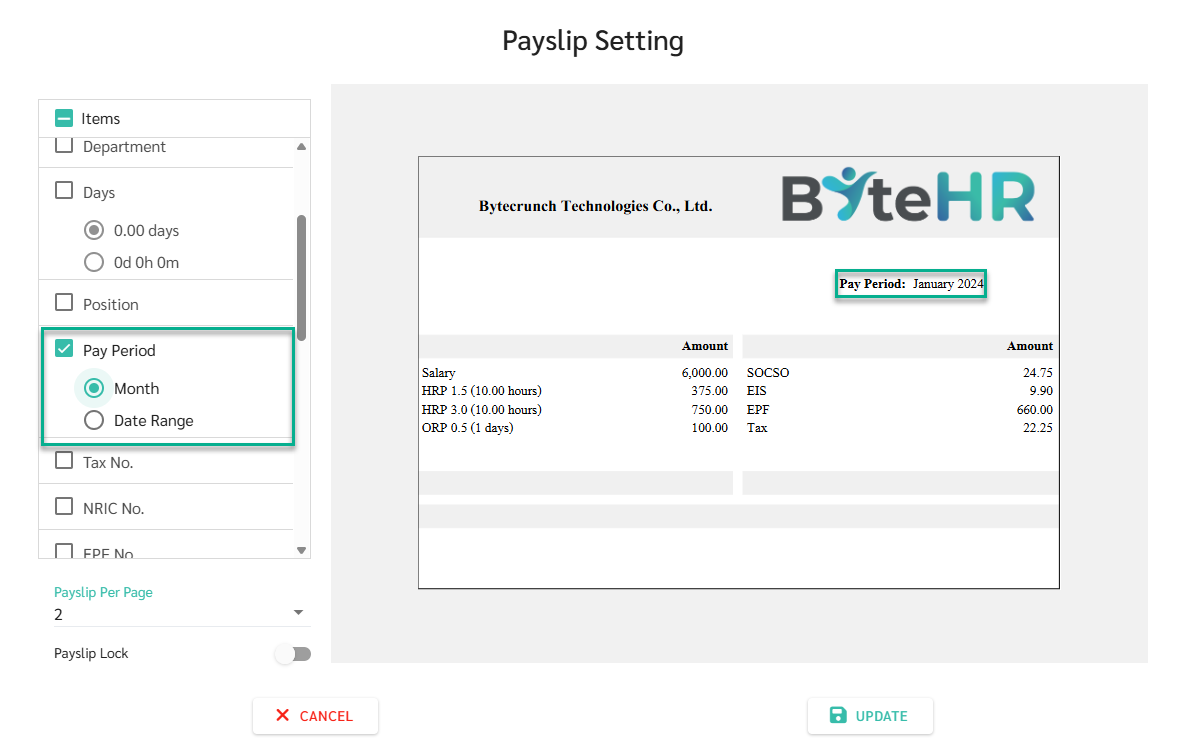
Selecting the "Pay Period" Display Format
Admins can select the display format for the "Pay Period" on the employee payslip (available only for Standard Format) to align with the company's payroll cutoff cycle:
- Month: Displays the specific month and year, for example: March 2026
- Date Range: Displays the exact start and end dates of the payroll cycle, for example: 01/03/2026 – 31/03/2026
📢 Important Note
- The Company Address and Company Stamp fields are not default settings. The admin must manually select these fields if they wish to display details on the payslip.
- If you select Company Address, the system will display the company address information as it has been updated in the system.
- If you select "Company Stamp," the system will display the company stamp on the employee's payslip.