eCheckin: Face Scan Settings
How to Activate eCheckin Face Scan
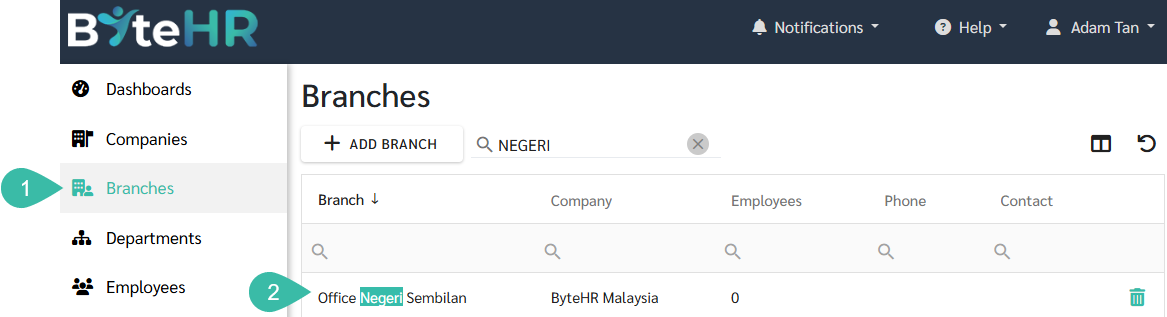
- Go to Branch.
-
Select the desired branch.
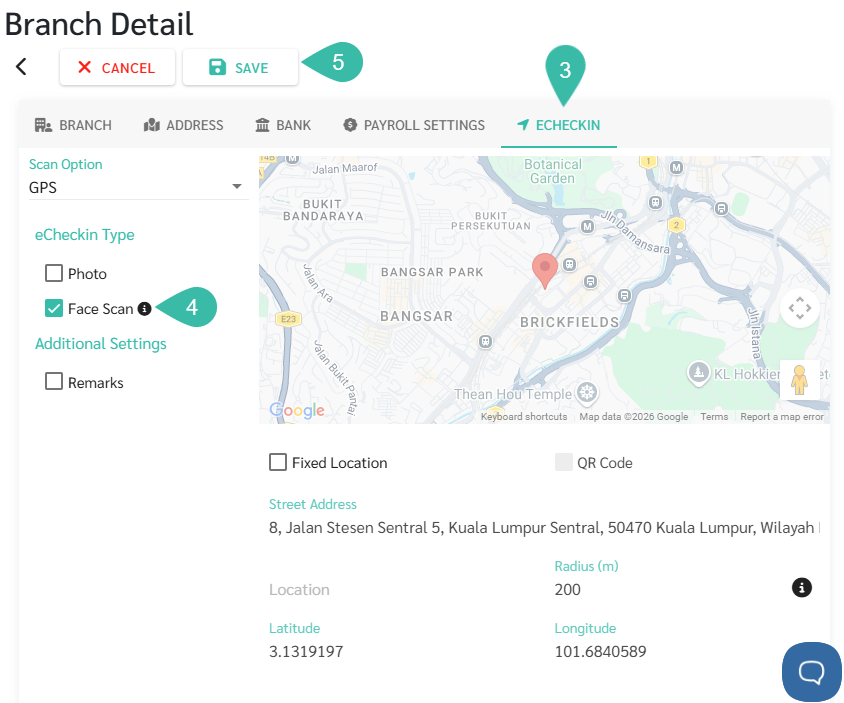
- Click ECHECKIN tab.
-
Enable the Face Scan option.
This can be used with both GPS and Beacon.
-
Click Save.
-
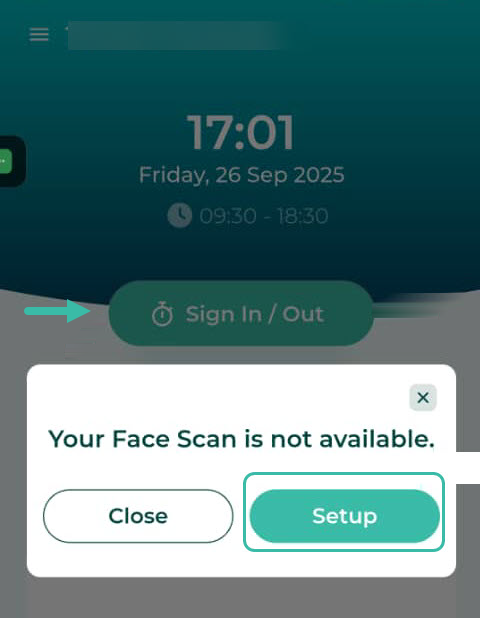
After enabling the Face Scan option, employees should press the Sign In/Out button, then click Setup to setup their Face Scan.
-
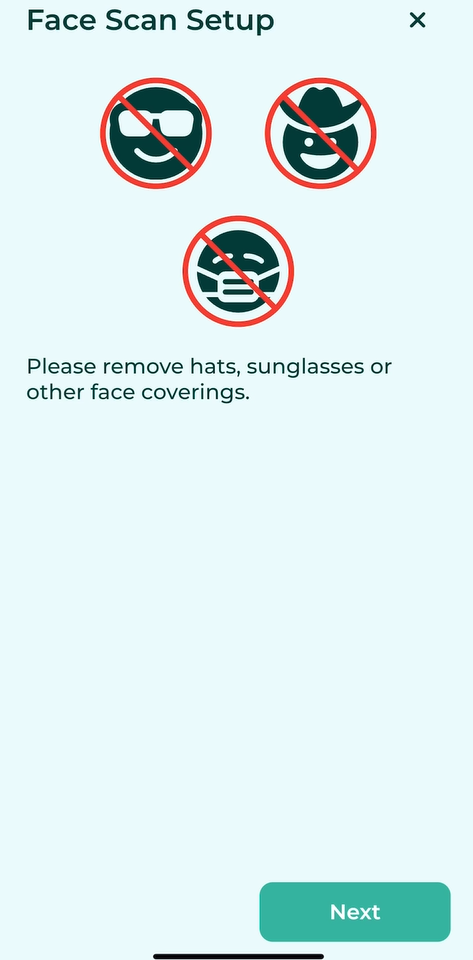
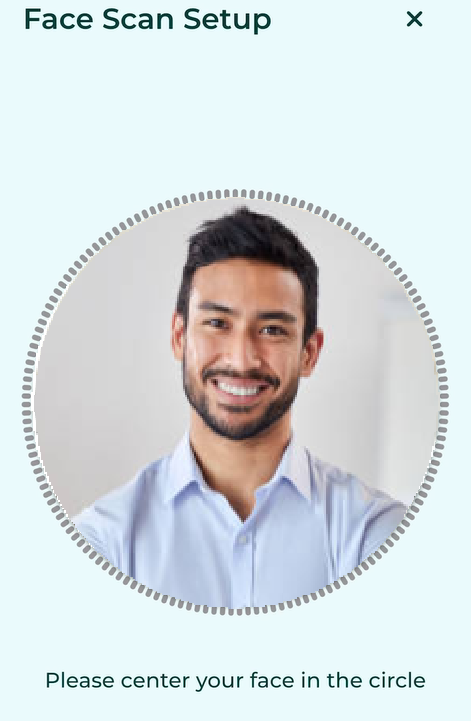
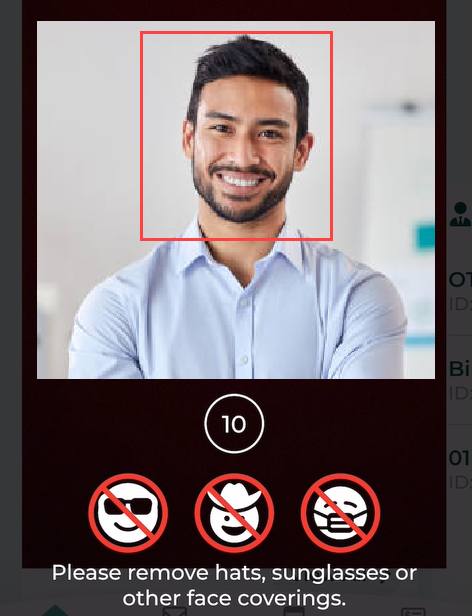
To take a photo of your face, please adhere to the face scan setup guidelines and avoid wearing any items such as hats, sunglasses or masks that may obscure your face. Click Next.
-
You should position your face in the centre of the photo frame to allow the system capture your picture.
-
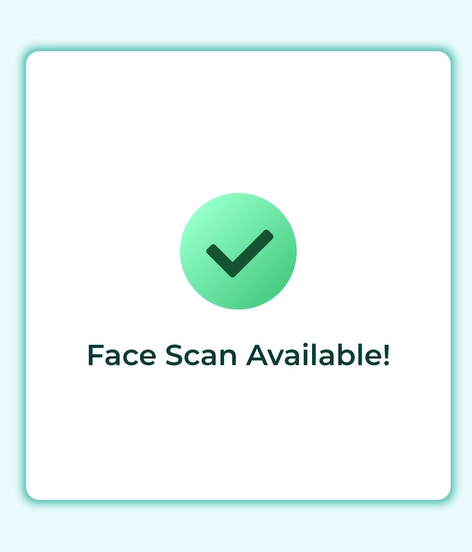
Once the system successfully captures your face, you will receive the message "Face Scan Available!".
-
Once the employee has successfully setup the face scan, they can click Sign In/Out button. The system will then scan the employee's face to record their timestamp.
The system will count down 10 seconds. If a correct face is not found, the Sign In/Out will fail.

-
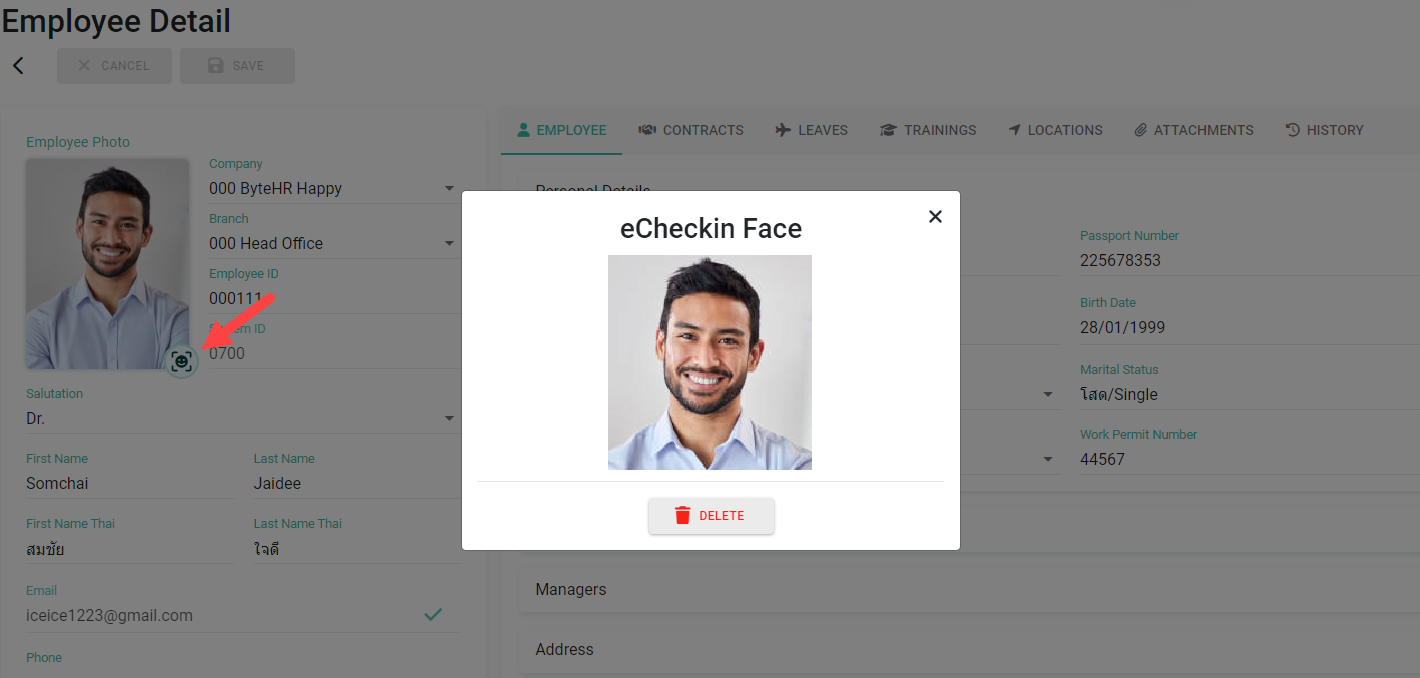
The admin can check the employee's facial recognition photo on the Employee Detail page. Click the face icon on the employee's profile picture.
-
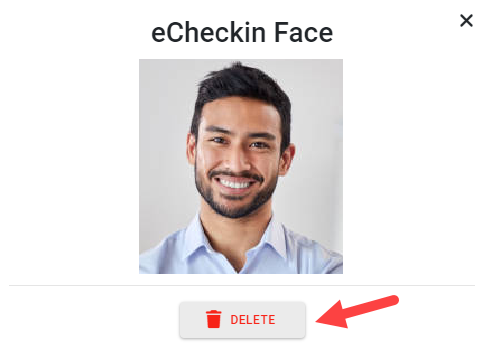
If you need an employee to save a new photo, the admin can click Delete, then Save, and have the employee set up their Face Scan again.


🚩Note
- When Face Scan is enabled, employees will only be able to clock in and out via the mobile app.
- The system will only detect real faces; photos or videos cannot be used for Signing In/out.
-
If the system detects the use of a photo or video, a red frame will be displayed around the face.

📃Notes
-
The Face Scan option cannot be enabled simultaneously with Photo.
If the Face Scan option is used, the system will automatically save the scanned face image upon successful Sign In/Out and display it in the Location Timestamp report.
- If the camera detects multiple faces during time clocking, the system will prioritize the face closest to it.